Connect Voxuy Enterprise
Run a Voxuy Enterprise flow on every PIX generated, sale, decline, subscription and abandoned checkout, with one flow per event or per offer.
With Voxuy Enterprise connected, every Vipter sale event creates or updates the contact in Voxuy Enterprise, records the transaction and runs the flow you chose for that event. This page is for Voxuy Enterprise (voxuyenterprise.com.br). For the Voxuy of the voxuy.com dashboard, follow Connect Voxuy.
Before you start, it helps to read how automations work.
Before you start
- A Voxuy Enterprise account with access to its settings.
- The flows that should run already created in Voxuy Enterprise, with each one's ID written down.
- The Admin or Owner role in the Vipter project.
Step 1: copy the webhooks URL in Voxuy Enterprise
- In Voxuy Enterprise, open ConfiguraçõesIntegrações (Settings › Integrations) and look for API in the App Store.
- Under URL para webhooks (webhooks URL), click Copiar (Copy).
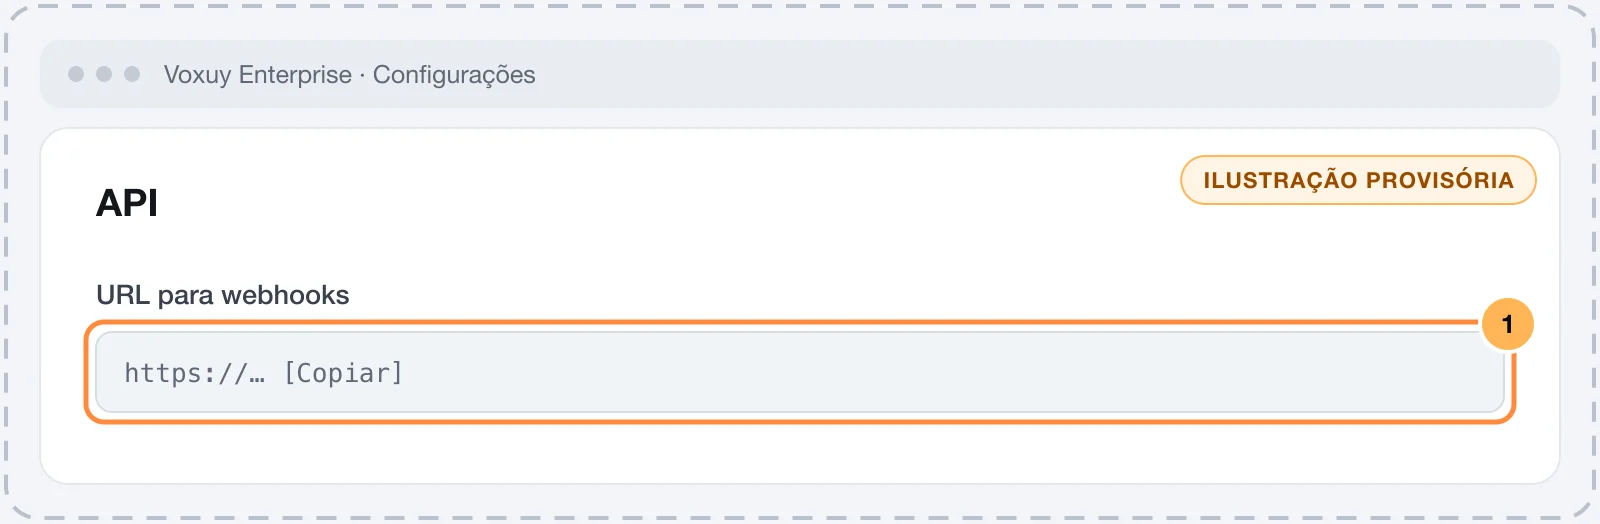
The URL already identifies your account. There is no token.
The URL works like a password
Anyone with the URL can send contacts and transactions to your account. Paste the URL only into Vipter and don't publish it.
Step 2: connect in Vipter
- In the Vipter dashboard, open GeneralIntegrationsAutomationsVoxuy Enterprise.
- Under Connection, fill in the numbered fields and the flows per event.
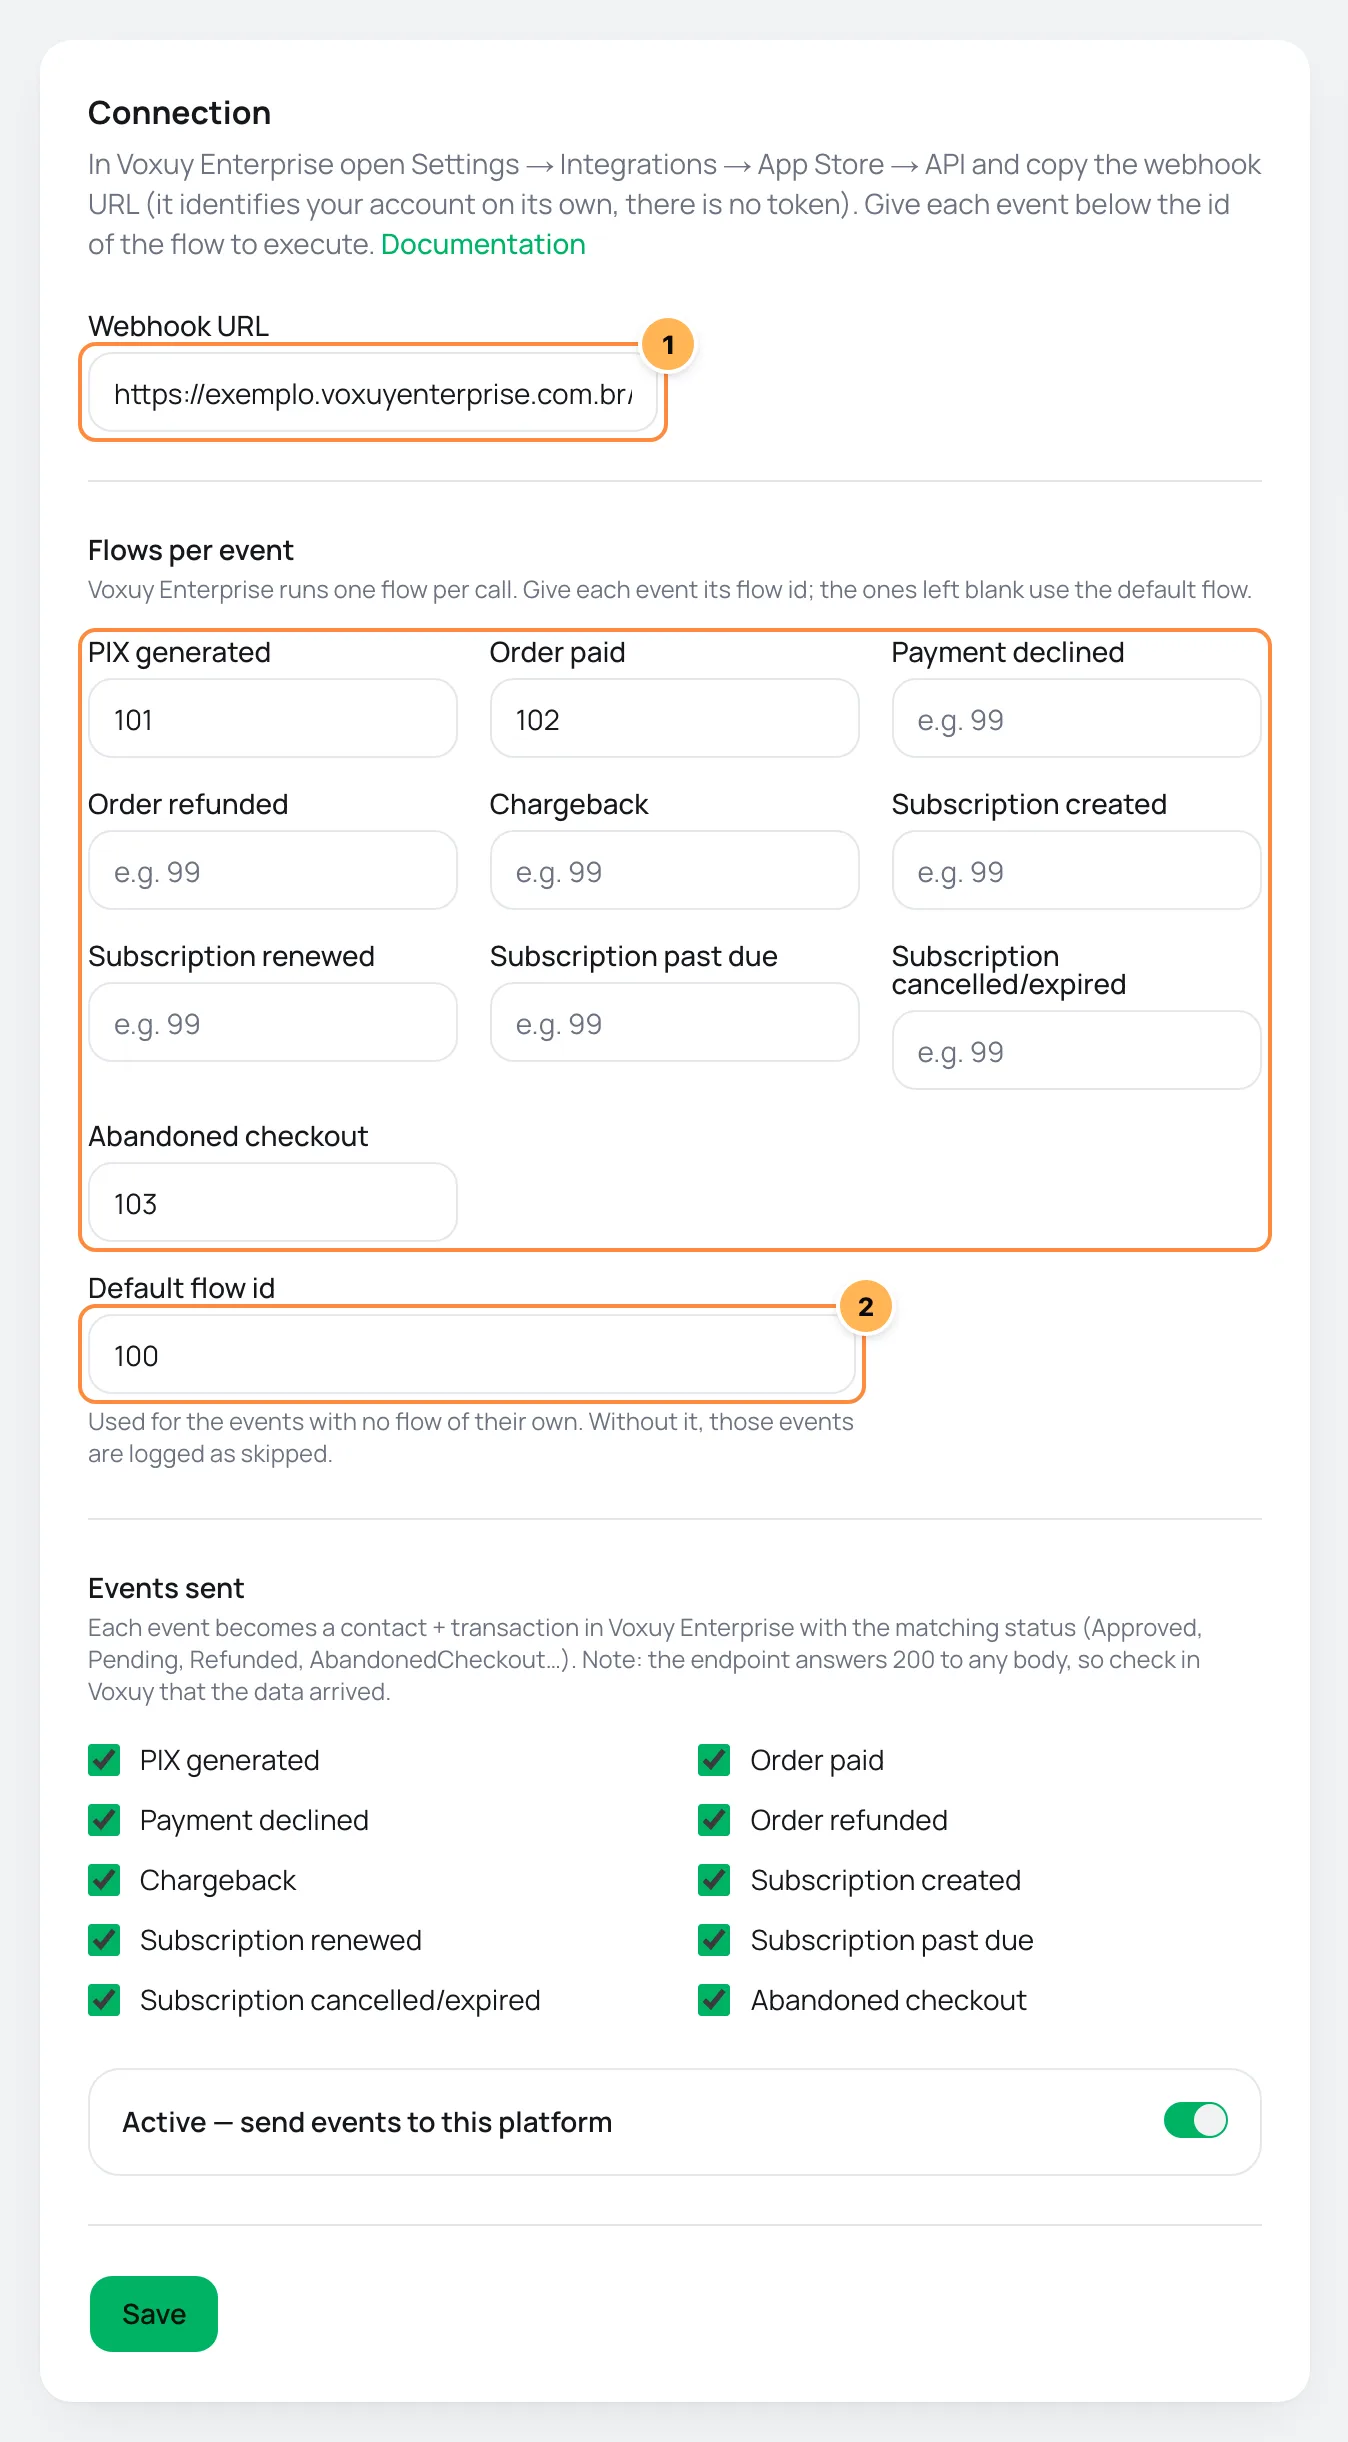
| # | Field | What to paste |
|---|---|---|
| 1 | Webhook URL | The webhooks URL you copied in step 1. It must start with https://. |
| 2 | Default flow id | The flow run on events without their own flow. Numbers only. |
- Under Flows per event, enter the flow ID for each event that should run a specific flow, such as
102in Order paid. Leave blank the ones that should use the default flow. - Under Events sent, uncheck what you don't want to send.
- Leave Active — send events to this platform on and click Save.
Vipter picks the flow in this order: the offer's rule (step 3), the event's flow and, last, the Default flow id. With none of the three, the event shows as skipped.
Step 3: use one flow per offer (optional)
Do this step when an offer needs a flow of its own, such as a mentorship with its own support.
- Under Flows per offer, pick the Offer.
- Enter the Flow id.
- Click Add rule.
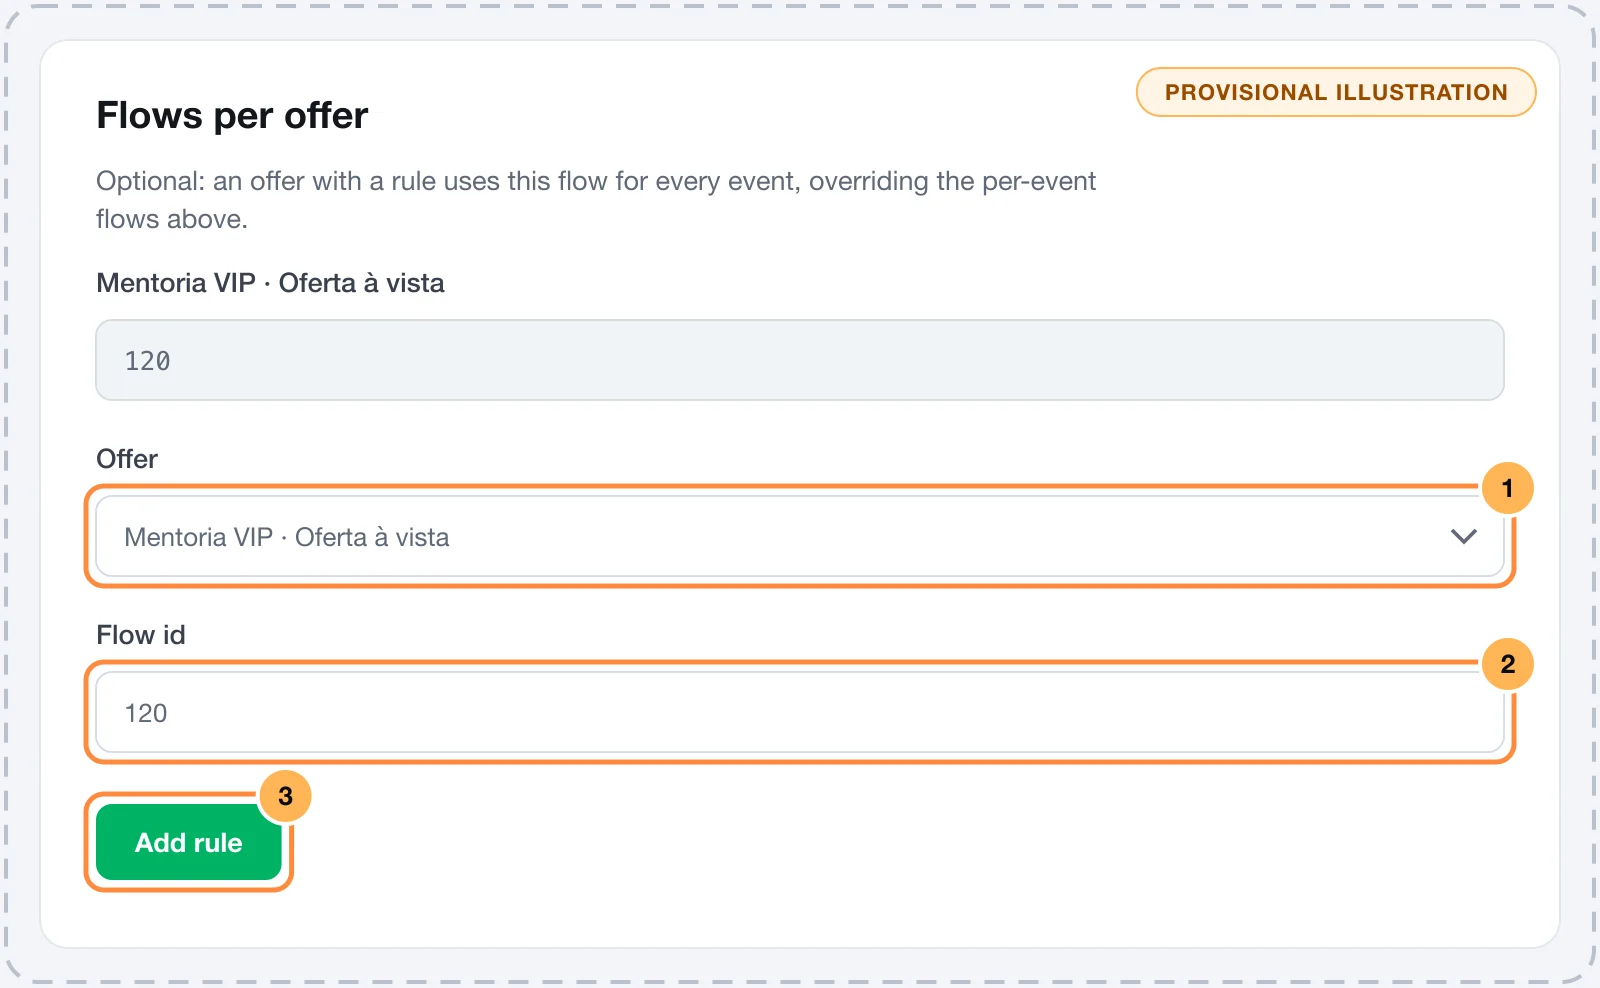
Optional: an offer with a rule uses this flow for every event, overriding the per-event flows above. The rule also applies to the other offers of the same product.
Step 4: test and confirm delivery
Open the checkout of an offer, fill it in with your e-mail and your phone and generate a PIX, without paying. Then reload the Voxuy Enterprise page in Vipter.
Sent does not mean it arrived
Each event becomes a contact + transaction in Voxuy Enterprise with the matching status (Approved, Pending, Refunded, AbandonedCheckout…). Note: the endpoint answers 200 to any body, so check in Voxuy that the data arrived. Vipter only marks it as failed when the response has "success": false or an HTTP error. So confirm the first delivery inside Voxuy Enterprise: look up the contact by the test purchase's e-mail or phone and check that the transaction and the flow show up.
It worked if
The PIX generated event shows as sent under Recent deliveries and the test purchase's contact shows up in Voxuy Enterprise, with the pending transaction and the flow run.
What Voxuy Enterprise receives
Each call carries the flow ID, the contact and the transaction. Amounts go in cents.
- Contact: name, e-mail, phone with country code, CPF or CNPJ (Brazilian individual or company taxpayer ID) and address, when present. The phone is optional here: the order number identifies the transaction.
- Transaction: order number, date, payment method, status, total amount, currency and installments. Depending on the event, also the link to resume the purchase and the decline reason.
- Contact variables: whatever has no field of its own goes in
contact.variables: the event (evento), the offer (ofertaId,ofertaNome), the quantity, the pack, the order bumps (orderBumps,orderBumpsValor), the subscription, the PIX code (pixCopiaECola,pixUrl) and the UTMs. Use these variables in the flow's messages.
| Event in Vipter | Transaction status |
|---|---|
| PIX generated | Pending |
| Order paid | Approved |
| Payment declined | Rejected |
| Order refunded | Refunded |
| Chargeback | Chargeback |
| Subscription created | Approved |
| Subscription renewed | Approved |
| Subscription past due | Rejected |
| Subscription cancelled/expired | Cancelled |
| Abandoned checkout | AbandonedCheckout |
Several events use the same status, such as Order paid and Subscription renewed. What tells them apart is each event's flow and the evento variable.
Common problems
-
The flow id is a whole number.
The flow ID only accepts numbers, with no spaces or letters.
-
Enter an https:// URL
The URL must start with
https://. Copy it again from Configurações › Integrações › App Store › API. -
The event shows as skipped with "no Voxuy Enterprise flow"
The event has no flow of its own, the offer has no rule and the Default flow id is empty. Fill in one of the three.
-
It shows as sent, but nothing happens in Voxuy Enterprise
Check that the URL is your account's and that the flow ID exists and is active. With a wrong URL or flow, the delivery can still show as sent. The event is not resent: fix it and run another test.
What to do next
- Understand the events and delivery statuses.
- Receive the same events in your system with webhooks.