Connect Google Ads
Record purchases and the other checkout steps as Google Ads conversions, with one conversion label per event.
With Google Ads connected, the Google tag loads on the checkout and the thank-you page and records a conversion for each event that has a label. In Google Ads, you create a conversion action for each step you want to measure, such as the purchase, and paste its label into Vipter.
Before you start, it helps to read how conversion tracking works.
Before you start
- A Google Ads account with admin or standard access.
- The Admin or Owner role in the Vipter project.
- At least one product created in Vipter.
Google Ads only receives from the browser
This platform only receives events from the browser: a PIX paid after the buyer closed the page is not counted. To count those sales, also connect Google Analytics 4 with the API secret and import its conversions into Google Ads.
Step 1: create the conversion actions in Google Ads
- In Google Ads, open GoalsConversionsSummary and create a website conversion action for each step you want to measure. The most important one is the purchase.
- Open the action you created and its tag setup. Choose the option to use Google Tag Manager: it shows the Conversion ID and the Conversion label.
- Note the Conversion ID, which is the same for every action in the account, and each action's label.
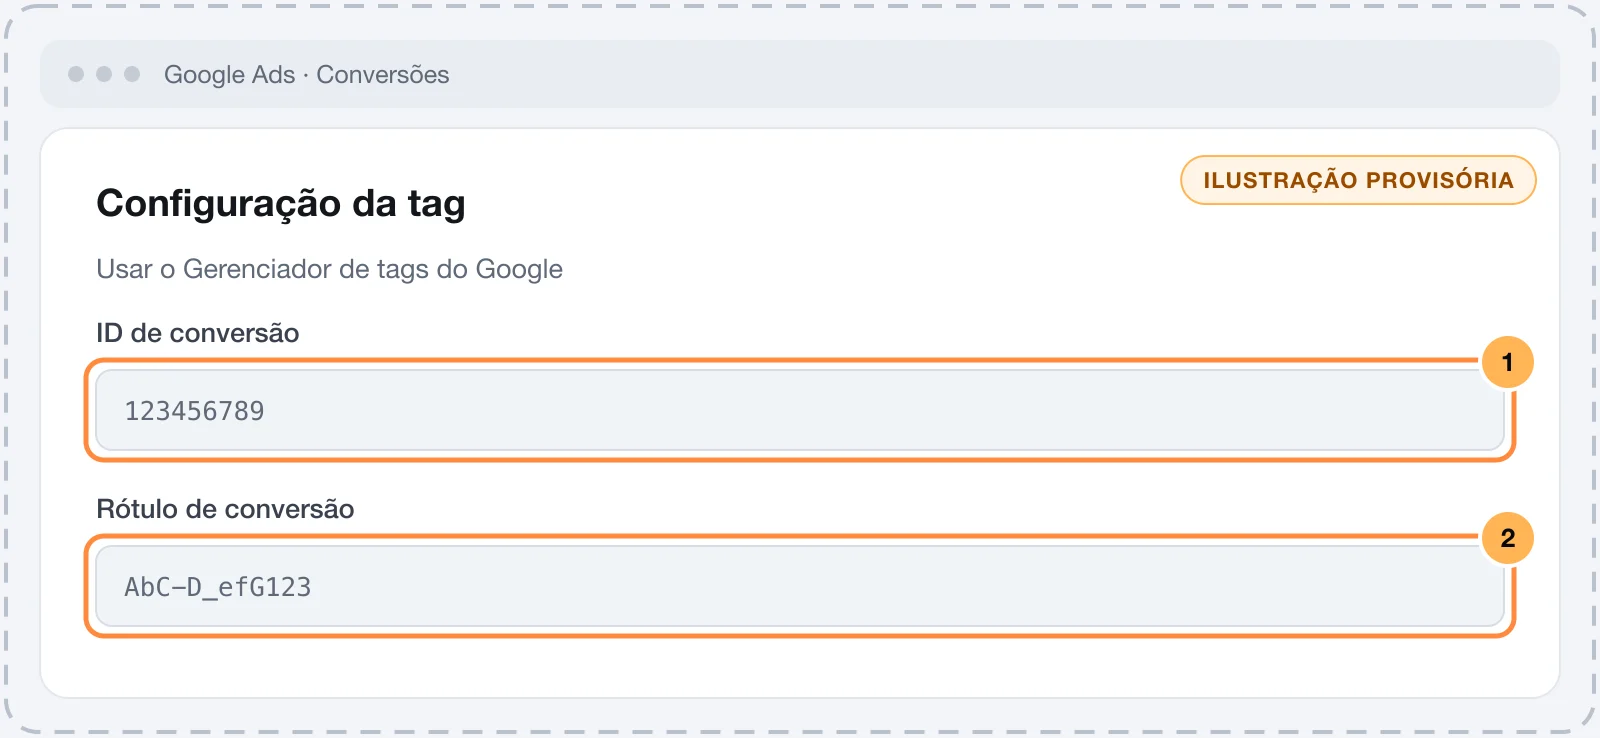
In the Google tag, both show up together in send_to, such as AW-123456789/AbC-D_efG123. The ID is the part before the slash, and the label is the part after it.
Step 2: connect the account in Vipter
- In the Vipter dashboard, open GeneralConversionsAccounts and click Connect account. Choose Google Ads.
- Fill in the numbered fields.
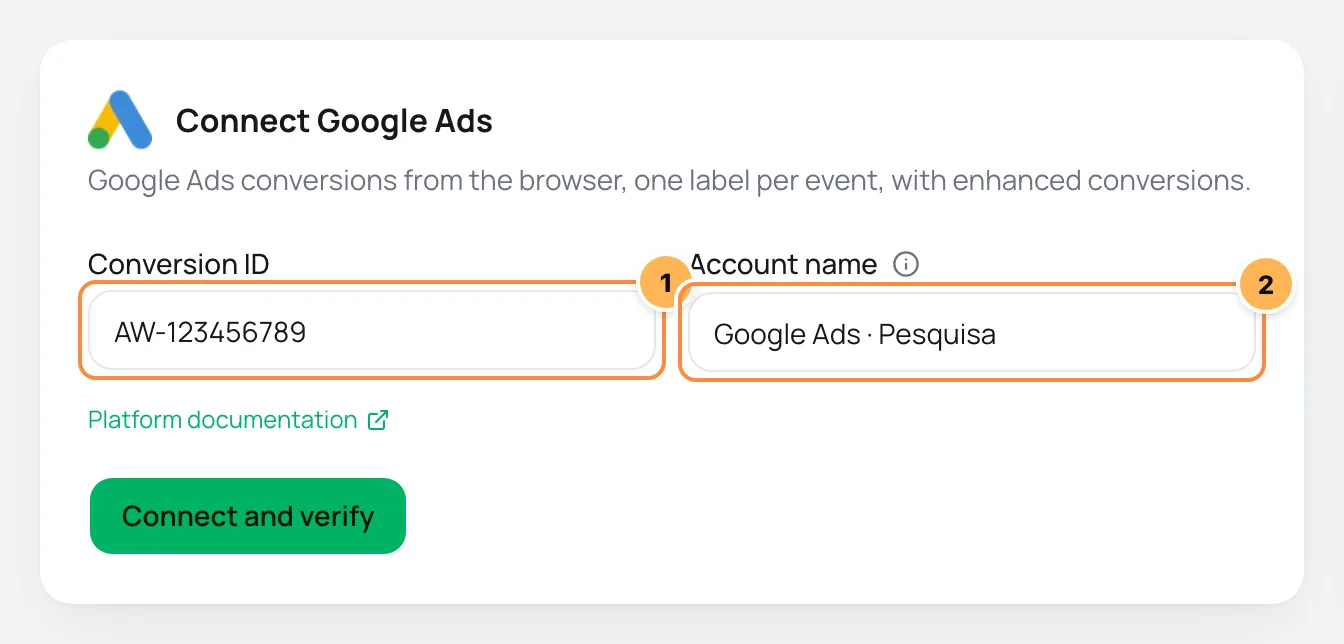
| # | Field | What to paste |
|---|---|---|
| 1 | Conversion ID | The Conversion ID with the AW- prefix, such as AW-123456789. If Google Ads only shows the numbers, type AW- before them. |
| 2 | Account name | A name to recognize the account, such as "Store Google Ads". If left blank, it is "Google Ads". |
- Click Connect and verify and then Continue.
- Check the products where conversions should be recorded and click Finish. Turn on Use automatically on new products to include products created later.
Step 3: paste the conversion labels
Without a label, the event doesn't become a conversion. The labels are in the account's What to send tab.
- Open the account in Accounts and go to the What to send tab.
- Under Google Ads conversion labels, paste each conversion action's label next to the matching event. Leave blank the events you don't want to measure.
- Click Save.
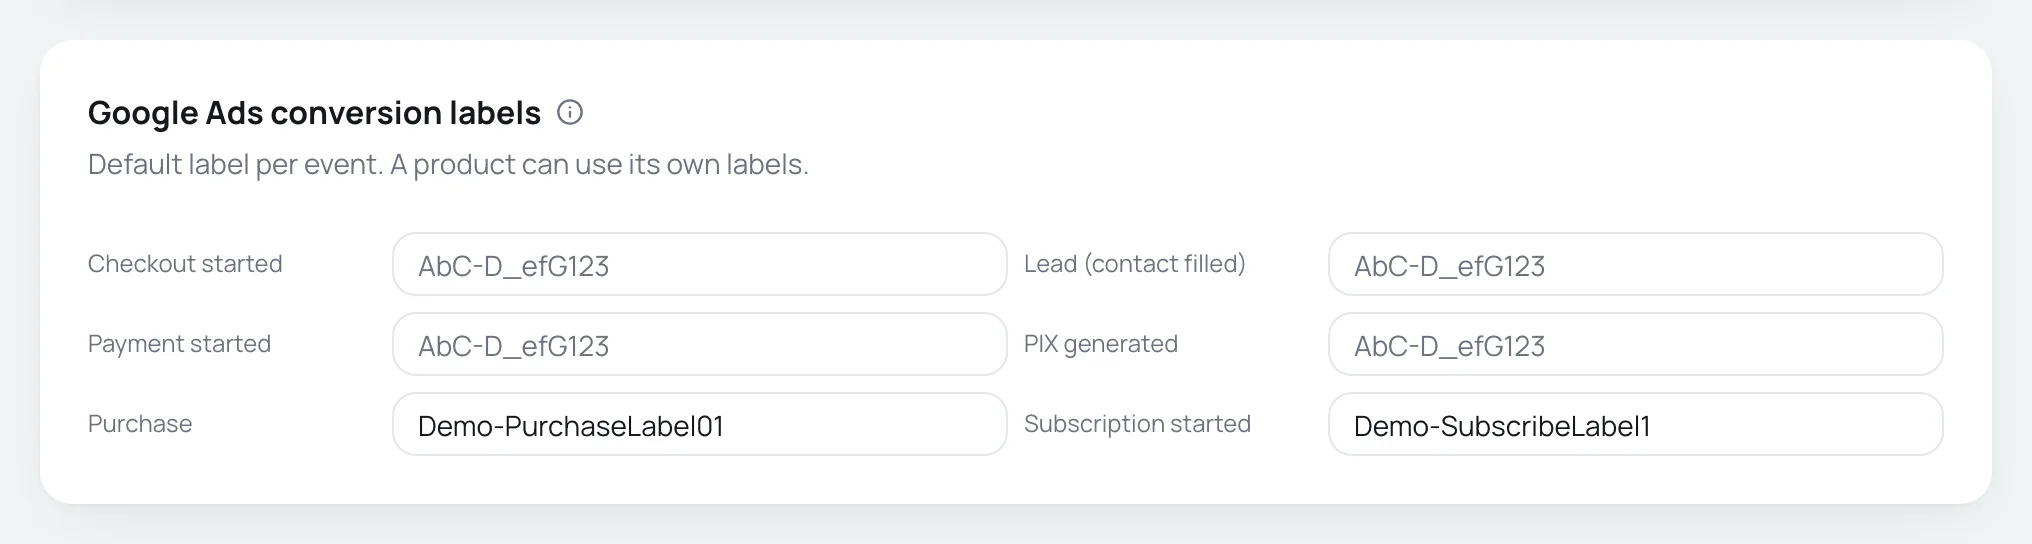
An event's field is locked when the event is off under Events sent, at the top of the same tab. A product can use its own labels: in GeneralConversionsOverview, click the product's cell and choose Adjust on this product….
Step 4: test
Google Ads has no server delivery, so the account doesn't have the test event button.
- Open the checkout of a product linked to the account and make a test purchase.
- Follow the conversion action in Google Ads. A new action only shows conversions after it receives the first one.
- In Vipter, the account's Connection tab shows when the first event was received, after someone fills in their details on the checkout.
It worked if
The verification shows ID in the expected format and, after someone fills in their details on the checkout, the first event received. The test purchase appears in GeneralConversionsActivity, on the Browser channel, and in the purchase conversion action in Google Ads.
What Vipter sends to Google Ads
Each event with a label becomes a conversion of that label's action.
| Event in Vipter | Conversion in Google Ads |
|---|---|
| Checkout started | The action of this event's label |
| Lead (contact filled) | The action of this event's label |
| Payment started | The action of this event's label |
| PIX generated | The action of this event's label |
| Purchase | The action of this event's label |
| Subscription started | The action of this event's label |
- Google Ads doesn't receive Page view, Shipping chosen, Renewal or Refund / chargeback.
- Each conversion carries the value and currency. The purchase carries the order ID as the transaction ID, and Google Ads uses this ID to avoid counting the same purchase twice.
- With Email on under Matching data, the tag receives the buyer's e-mail (and the phone, if Phone is on) for enhanced conversions. To use this data, turn on enhanced conversions in the Google Ads conversion settings.
- In What to send, also choose the Conversion value and the Value currency. See events and values.
Common problems
-
Invalid format on the ID field
The ID must start with
AW-followed only by numbers. Don't paste the label or the wholesend_to. -
No conversion shows up in Google Ads
The event has no label or is off. Check the labels in What to send and, if the product has adjustments, the product's labels.
-
PIX sales show up less than in Vipter
The buyer paid the PIX (Brazil's instant payment) in their banking app and didn't return to the thank-you page. Google Ads only receives from the browser. See the warning at the top of this page.
-
Conversions disappear when the buyer declines cookies
With the consent banner on, the tag only loads after the buyer accepts.
What to do next
- Connect Google Analytics 4 to also get the sales confirmed by the server.
- Paste the UTM script on your sales page so you don't lose the ad's
gclid.
Connect Pinterest Ads
Send checkout visits, leads and purchases to your Pinterest tag, from the browser and through the Conversions API, including PIX paid after the page was closed.
Connect Google Analytics 4
Send visits, checkout steps and purchases to GA4, from the browser and through the Measurement Protocol, including renewals and refunds.