Connect Meta Ads (Pixel and Conversions API)
Send checkout visits, leads and purchases to your Meta Pixel, from the browser and through the Conversions API, including PIX paid after the page was closed.
With Meta Ads connected, the Meta Pixel fires on the checkout and the thank-you page, and the Conversions API sends the same events from the server. The purchase is reported when the payment is confirmed, including a PIX (Brazil's instant payment) paid after the buyer closed the page. Both deliveries carry the same identifier, and Meta counts each sale once.
Before you start, it helps to read how conversion tracking works.
Before you start
- A Meta Pixel (dataset) in Events Manager and admin access to the business that owns it.
- The Admin or Owner role in the Vipter project.
- At least one product created in Vipter.
Step 1: copy the pixel ID and generate the token in Meta
- Open Meta Events Manager and choose your pixel. Copy its ID, which has only numbers.
- In the pixel, open SettingsConversions API and click Generate access token. Copy the token.
- To test before selling, open the same pixel's Test events tab and copy the test code, such as
TEST12345.
Keep the token safe
With the token, anyone can send events to your pixel. Paste the token only into Vipter. Once saved, it is stored encrypted and not shown again; the screen only shows its last characters.
Step 2: connect the account in Vipter
- In the Vipter dashboard, open GeneralConversionsAccounts and click Connect account. Choose Meta Ads.
- Fill in the numbered fields. The test code is under Advanced: test mode.
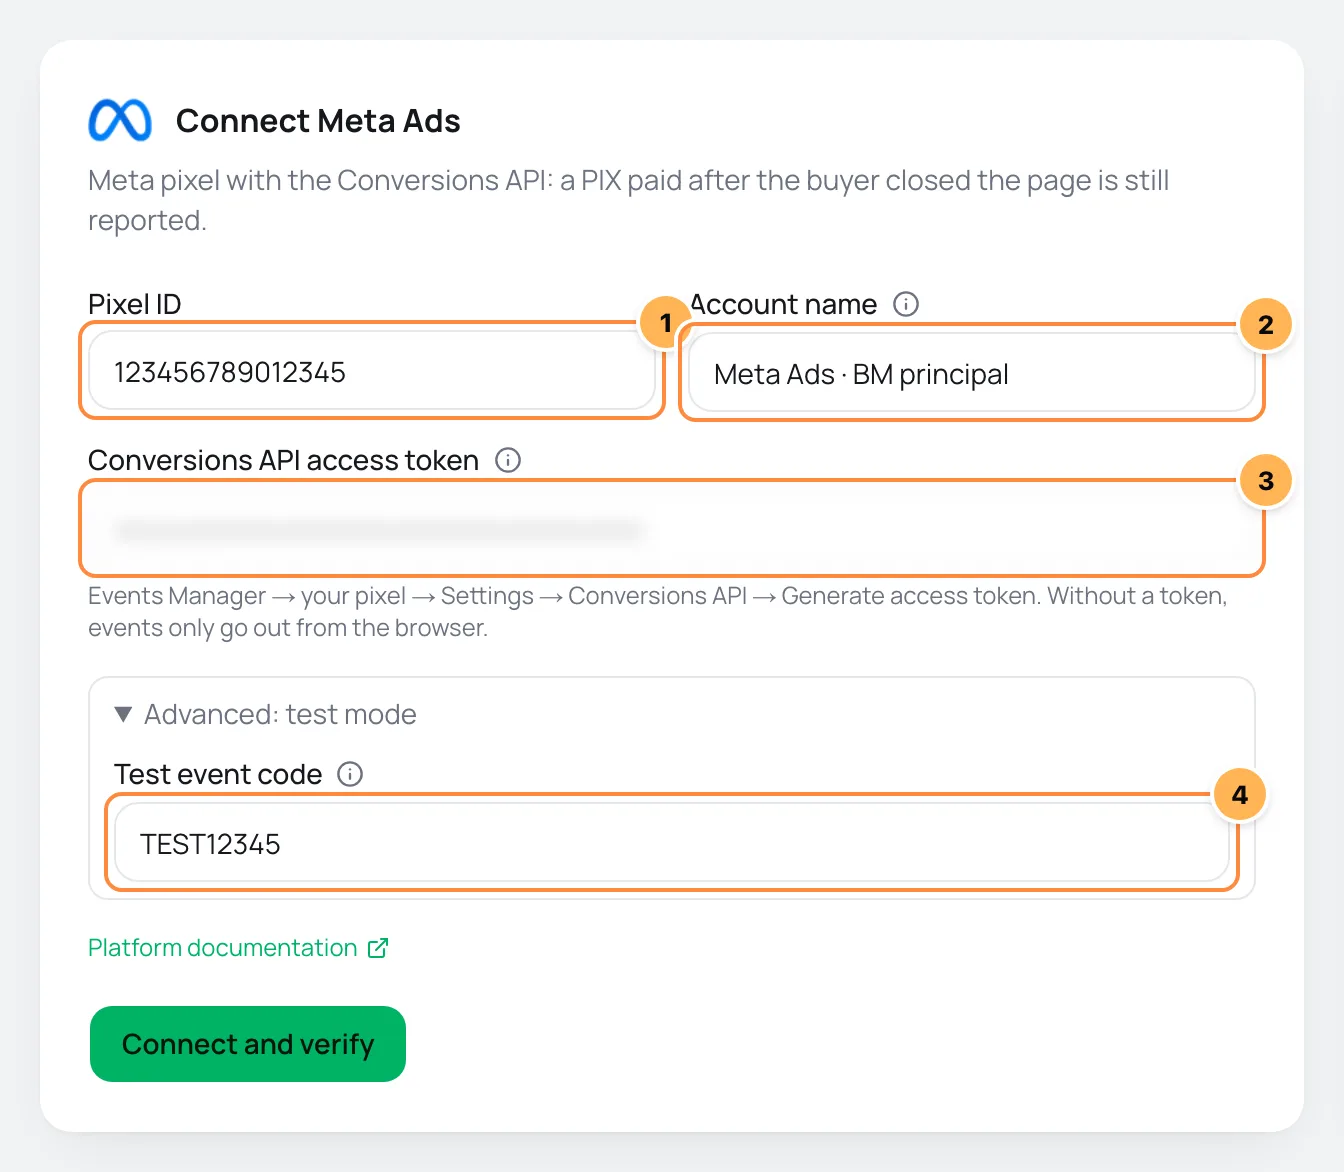
| # | Field | What to paste |
|---|---|---|
| 1 | Pixel ID | The pixel ID you copied in step 1. Numbers only. |
| 2 | Account name | A name to recognize the account, such as "Main BM" or "Affiliate John". If left blank, it is "Meta Ads". |
| 3 | Conversions API access token | The Conversions API token from step 1. Without it, events only go out from the browser and a PIX paid after the page was closed is not counted. |
| 4 | Test event code | The code from the Test events tab, only while you test. Delete it when you are done. |
- Click Connect and verify. Vipter saves the account and checks the ID and token with Meta. The result shows under Verification.
- Click Continue.
Step 3: choose the products
- Under Where to use, check the products the pixel should fire on, or click Select all.
- Turn on Use automatically on new products if products created later should also use this pixel. Leave it off for an affiliate's pixel or a single-product pixel.
- Click Finish.
You can change the products later in GeneralConversionsOverview or in the account's Products tab.
Step 4: verify and test
Open the account in Accounts and stay on the Connection tab.
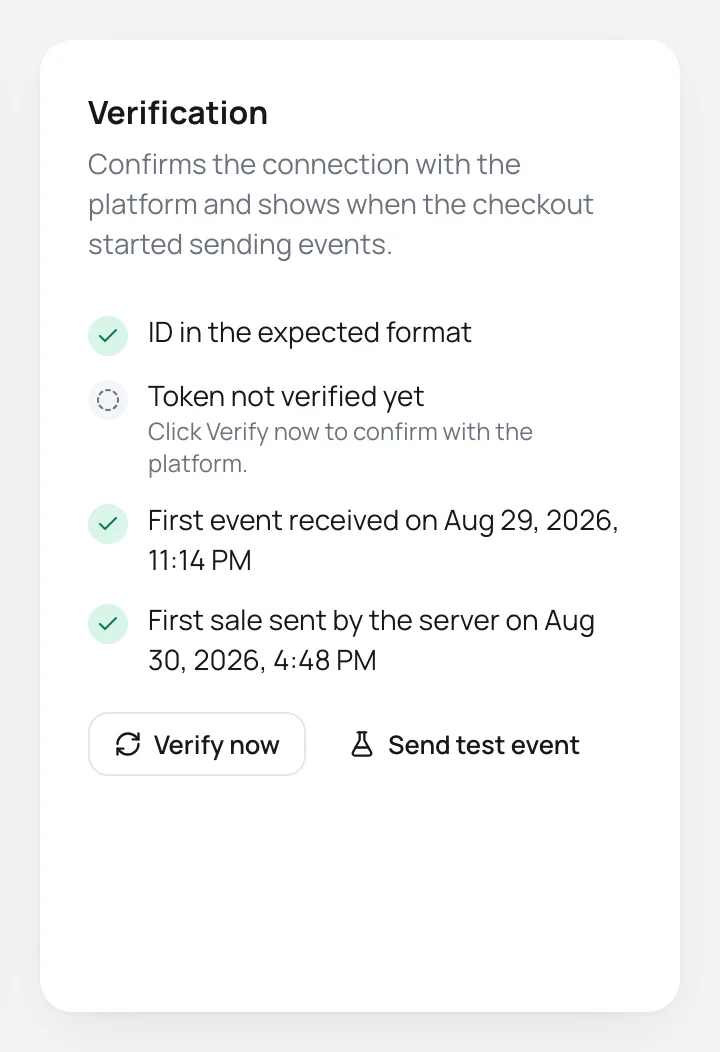
- Click Verify now. With the test code saved, Vipter sends a test event to Meta. Without the code, it checks the token without creating any conversion.
- To watch an event arrive, keep the test code saved, open the Test events tab in Meta and click Send test event. Vipter sends a 1.00 test purchase in the project's currency. This button only shows when the account sends from the server.
- Delete the test code in Connection and click Save.
It worked if
The verification shows Token accepted by the platform, the test shows Test event accepted by the platform (HTTP 200). and the test purchase appears in Test events in Meta. After the first real sale, the list also shows the first event received and the first sale sent from the server.
What Vipter sends to Meta
The account's What to send tab sets the events and the value. Names Meta receives:
| Event in Vipter | Name in Meta |
|---|---|
| Page view | PageView |
| Checkout started | InitiateCheckout |
| Lead (contact filled) | Lead |
| Shipping chosen | AddShippingInfo (custom event) |
| Payment started | AddPaymentInfo |
| PIX generated | PixGerado (custom event, editable name) |
| Purchase | Purchase |
| Subscription started | Subscribe |
| Renewal | RenovacaoAssinatura (custom event, server only) |
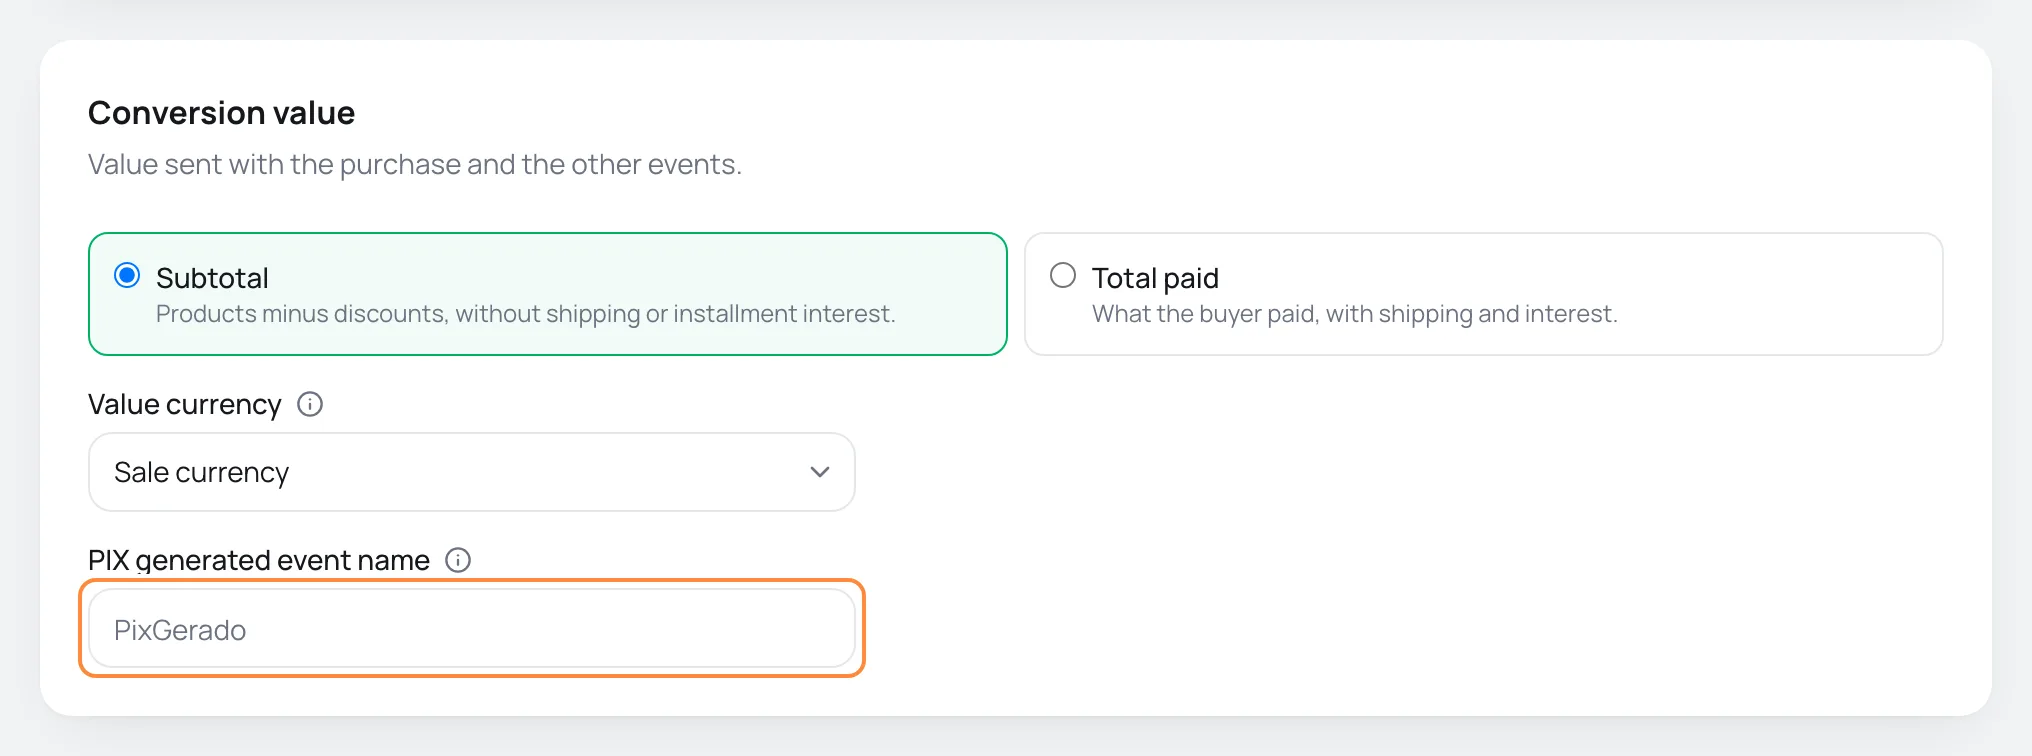
- Conversion value: Subtotal (Products minus discounts, without shipping or installment interest.) or Total paid (What the buyer paid, with shipping and interest.).
- Value currency: Use the project currency if the ad account does not accept the sale currency. Conversion uses the day's rate.
- PIX generated event name: Custom event sent when the PIX QR code shows up. Default: PixGerado. Change the name if you already use another event for PIX in your campaigns.
- Matching data: e-mail, phone, name, address and customer ID, hashed with SHA-256 so Meta can find who clicked the ad.
Click Save. Products with their own adjustments keep the fields they adjusted.
Verify the domain with Meta (optional)
If the checkout uses a custom domain, you can verify it with Meta through the meta tag.
- In your Meta business settings, open the domains area (under Brand safety), choose the domain and meta tag verification.
- Copy only the code inside the meta tag, the
contentvalue. - In Vipter, open GeneralConversionsPreferences, paste the code into Meta (facebook-domain-verification) and click Save.
- Go back to Meta and click Verify.
Common problems
-
The token was not accepted: generate a new one in Events Manager (Settings → Conversions API → Generate access token) and paste it here.
The token was deleted, expired or was copied only in part. Generate another one and paste it in Connection.
-
The token is valid but has no permission for this dataset. In Business Manager open Business settings → Data sources → the pixel and give the system user (or whoever generated the token) the Manage pixel permission; the token must come from the business that owns this pixel.
The token belongs to another business or to the wrong user. Follow the path in the message to grant the permission, or generate the token in the business that owns the pixel.
-
Meta could not find this pixel ID for the token provided. Check that the ID belongs to the right dataset and to the same business as the token.
The ID is not the right pixel's. Copy the ID again from Events Manager.
-
Fill in and save the test event code first: without it the test counts as a real conversion.
Without a test code, the test purchase would count as a real sale. Save the code from the Test events tab and try again.
-
Meta rejected the test event. Check the test code in Events Manager → Test events.
The test code is wrong or belongs to another pixel. Copy it again from the Test events tab.
-
Your plan does not allow another account sending from the server. Upgrade to connect one more.
Your plan reached its limit of accounts with server delivery. Remove the token from an account you no longer use or change plans in Vipter plan.
What to do next
- Paste the UTM script on your sales page so you don't lose the click's source.
- Also connect Google Analytics 4.
Event activity and resending
See every event reported to the platforms, with each one's response, understand the automatic retries and resend what failed.
Connect TikTok Ads (Pixel and Events API)
Send checkout visits, leads and purchases to your TikTok pixel, from the browser and through the Events API, including PIX paid after the page was closed.