Connect Postmark
Send your store's e-mails through a Postmark server, with your domain, and get each message's delivery status in Vipter.
With Postmark connected, the order confirmation, the PIX awaiting payment notice (PIX is Brazil's instant payment method) and the store's other e-mails go out through a server in your Postmark account, with your name and your domain. Before you start, it helps to read how transactional e-mail works.
Before you start
- A Postmark account with a server created.
- The account approved by Postmark. Until it is approved, Postmark only delivers e-mails to addresses on the domains you added and verified, and buyers get nothing.
- Access to the DNS of the domain that will send the e-mails.
- The Admin or Owner role in the Vipter project.
Step 1: verify the domain in Postmark
Postmark only sends from verified addresses.
- In Postmark, open Sender Signatures and add the sender's domain, such as
yourdomain.com. - Create in your DNS the records Postmark shows (DKIM and Return-Path) and confirm the verification in Postmark.
Once the domain is verified, any address on it can send. What each record does is explained in verify the sending domain.
Step 2: copy the Server API Token
- Open Servers(your server)API Tokens.
- Copy the Server API Token.
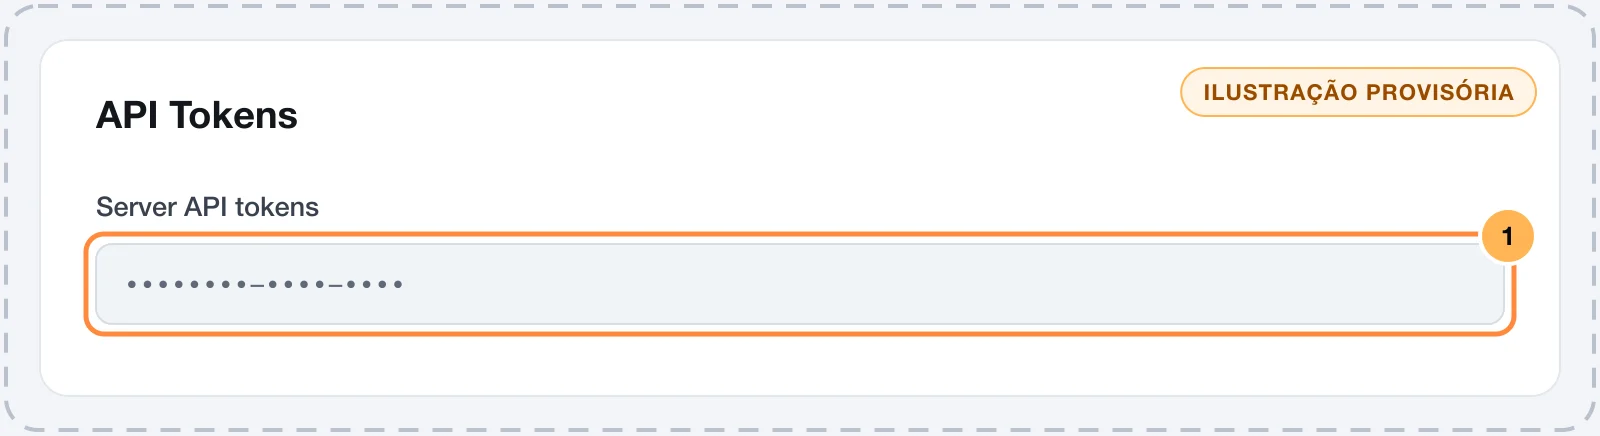
Use the server token, not the Account API Token: Vipter sends with the server token.
Keep the token safe
This token can send e-mails on behalf of your store. Paste it only into Vipter. If it leaks, generate a new one in Postmark and paste it into Vipter.
Step 3: connect in Vipter
- In the Vipter dashboard, open GeneralIntegrationsE-mailPostmark.
- Under Sender and credentials, fill in the numbered fields:
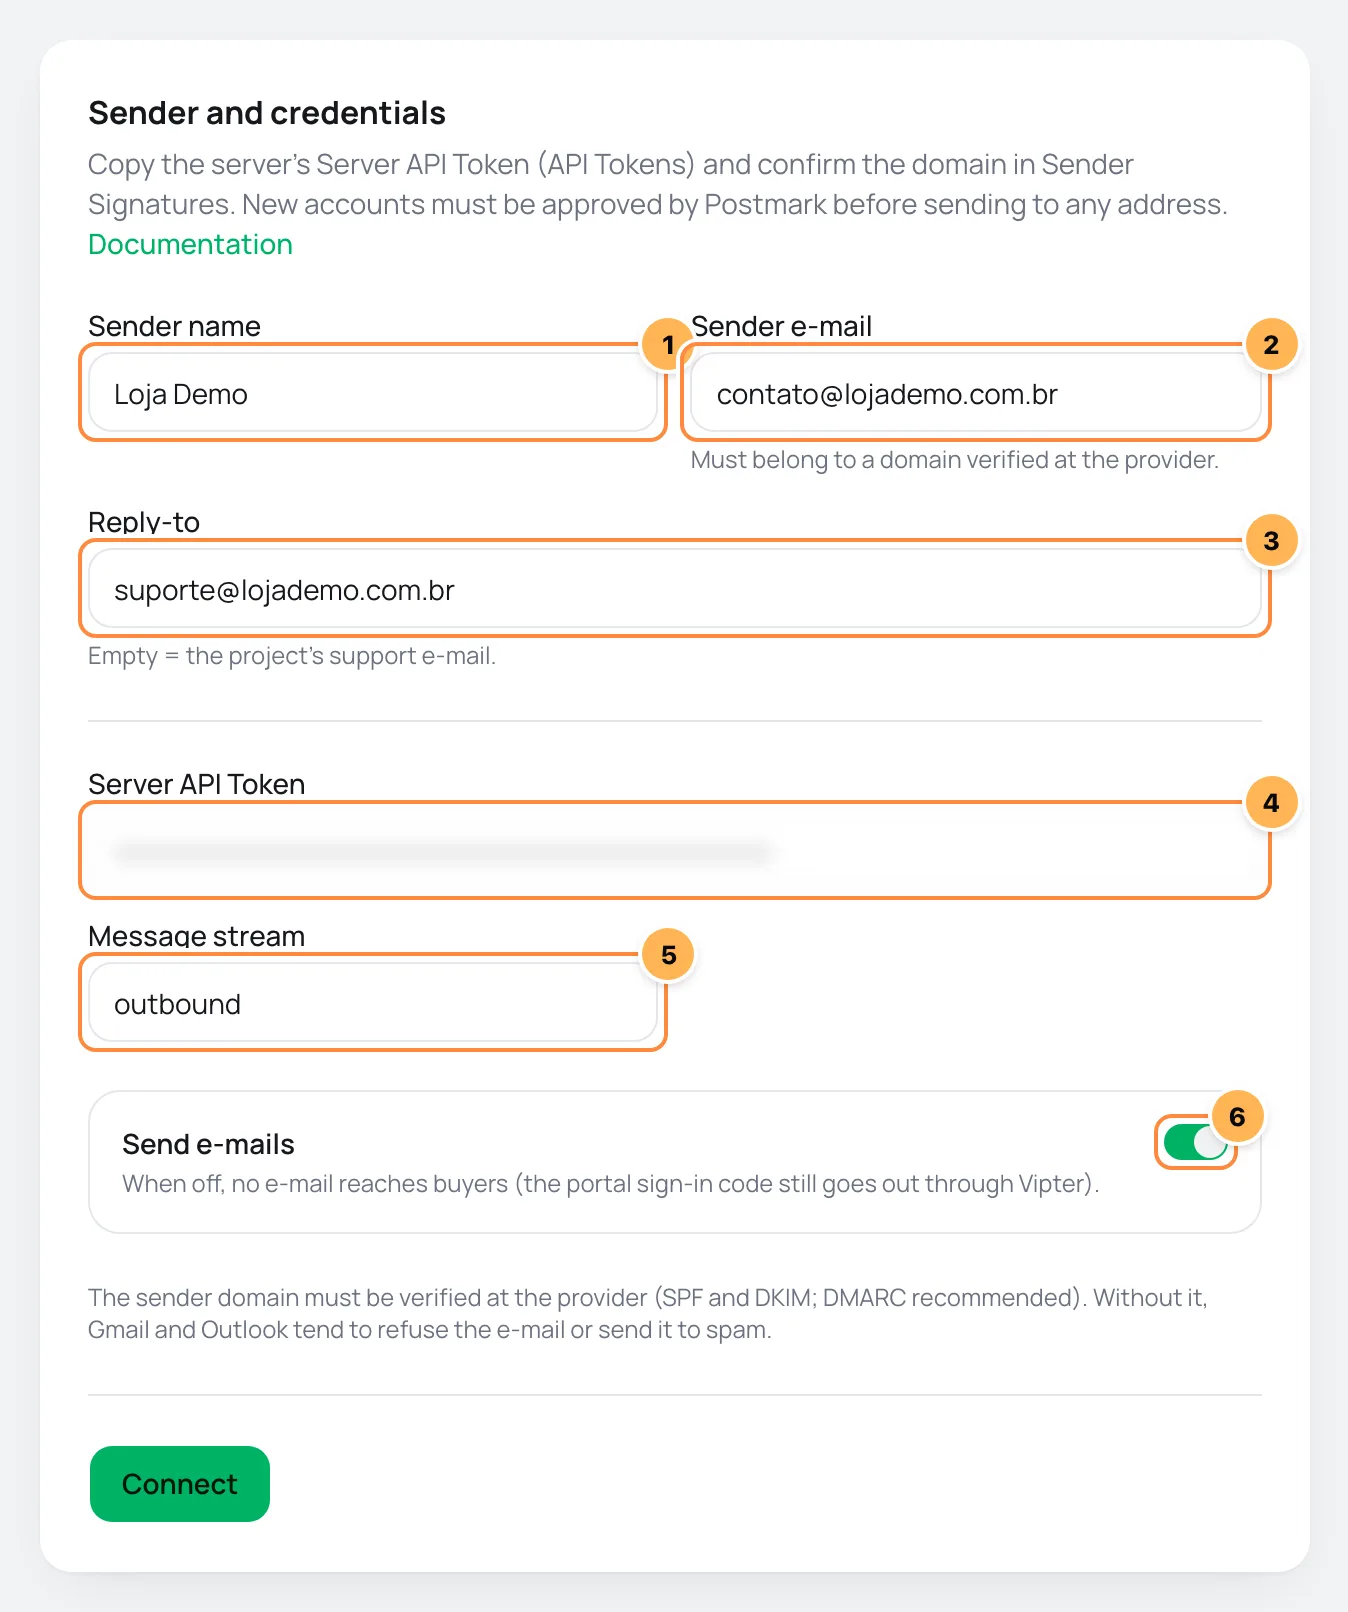
| # | Field | What to paste |
|---|---|---|
| 1 | Sender name | The name the buyer sees in the inbox, such as the store name. If blank, the project name is used. |
| 2 | Sender e-mail | An address on the domain you verified in step 1, such as contact@yourdomain.com. |
| 3 | Reply-to | Where the buyer's replies go. If blank, the project's support e-mail is used. |
| 4 | Server API Token | The Server API Token from step 2. Once saved, leave it blank to keep the current one. |
| 5 | Message stream | The ID of the server's transactional stream. Postmark's default is outbound; change it only if you use another transactional stream. Do not use a broadcast stream. |
| 6 | Send e-mails | Leave it on. When off, no e-mail goes out to buyers. |
- Click Connect. Vipter checks the token with Postmark.
Step 4: register the delivery status webhook
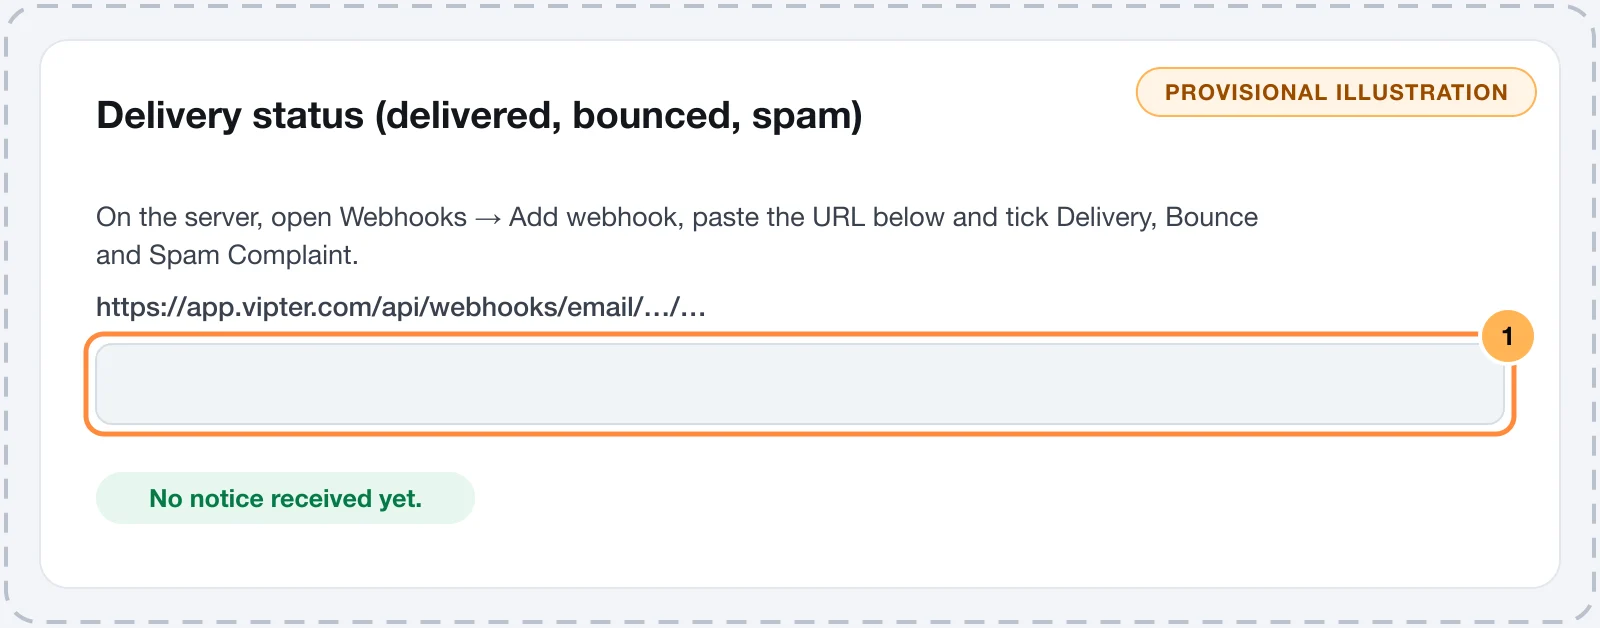
Through the webhook, Postmark tells Vipter when an e-mail is delivered, bounced or marked as spam. Without it, the history stays at Sent and invalid addresses keep getting e-mails.
- After saving, copy the URL from the Delivery status (delivered, bounced, spam) card, in the right-hand column.
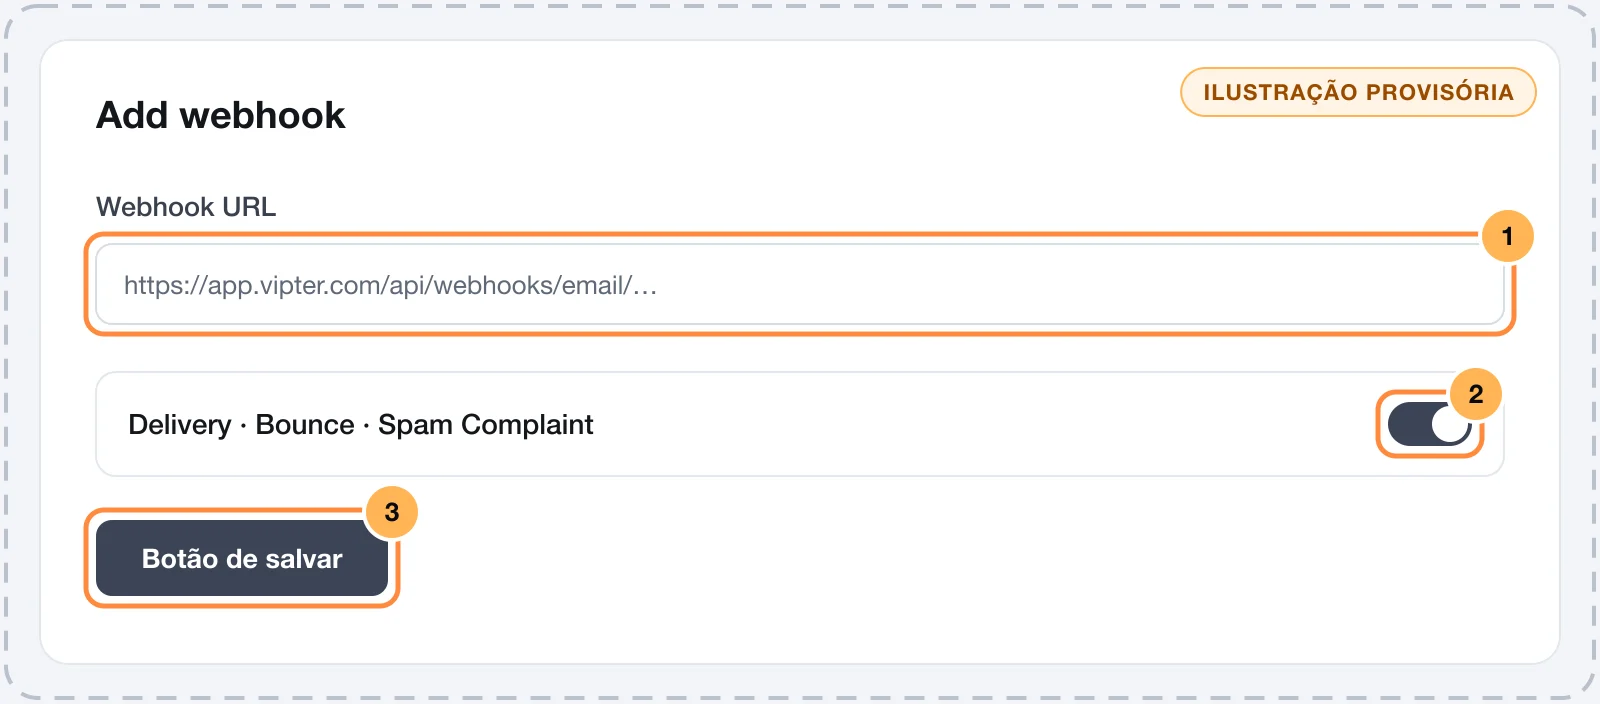
- In Postmark, open the server, go into the same stream you entered in Message stream and open the Webhooks tab.
- Click Add webhook and paste the URL into Webhook URL.
- Tick Delivery, Bounce and Spam Complaint and save. Postmark tests the URL when you save.
Step 5: test
- In Vipter, under Send test e-mail, check the address in Send to and click Send test e-mail.
- Open that address's inbox.
It worked if
You see the message Test e-mail sent to you@yourcompany.com., the status changes to Working, the e-mail arrives outside spam and, a few minutes later, the webhook card shows Last notice received on ….
With Postmark, the domain card shows The provider does not report verification for this key: domain verification lives only in the Postmark dashboard, and Vipter only checks SPF and DMARC in the DNS.
Common problems
-
The test reaches you, but buyers get nothing
Postmark has not approved the account yet. Request approval in the Postmark dashboard; until then, it only delivers to your own domains.
-
The test fails saying the sender has no confirmed Sender Signature
The Sender e-mail is on a domain or address Postmark has not verified. Finish step 1 or use a verified address.
-
The check fails with
401The token is wrong or it is the Account API Token. Copy the Server API Token from the server's API Tokens tab.
-
The webhook never receives notices
The webhook was created in another stream. It must be in the same stream as Message stream.
What to do next
- Verify the sending domain and add a DMARC record.
- Review which e-mails go out and the text of each one in GeneralSettingsE-mails.