Connect Utmify
Send Vipter orders to Utmify from the server, with UTMs, src and sck, from PIX generated to payment, refund and chargeback.
With Utmify connected, Vipter sends each order to Utmify from the server, with the sale's source (UTMs, src and sck). Utmify receives the order when the PIX (Brazil's instant payment) is generated and is updated when it is paid, refunded or disputed. There is no pixel in the browser: everything goes out from the server, including a PIX paid after the page was closed.
Before you start, it helps to read how conversion tracking works.
Before you start
- A Utmify account.
- The Admin or Owner role in the Vipter project.
- At least one product created in Vipter.
Step 1: create the API credential in Utmify
- In Utmify, open IntegraçõesWebhooksCredenciais de API (Integrations › Webhooks › API credentials).
- Click Adicionar Credencial (Add credential) and then Criar Credencial (Create credential).
- Copy the credential you created.
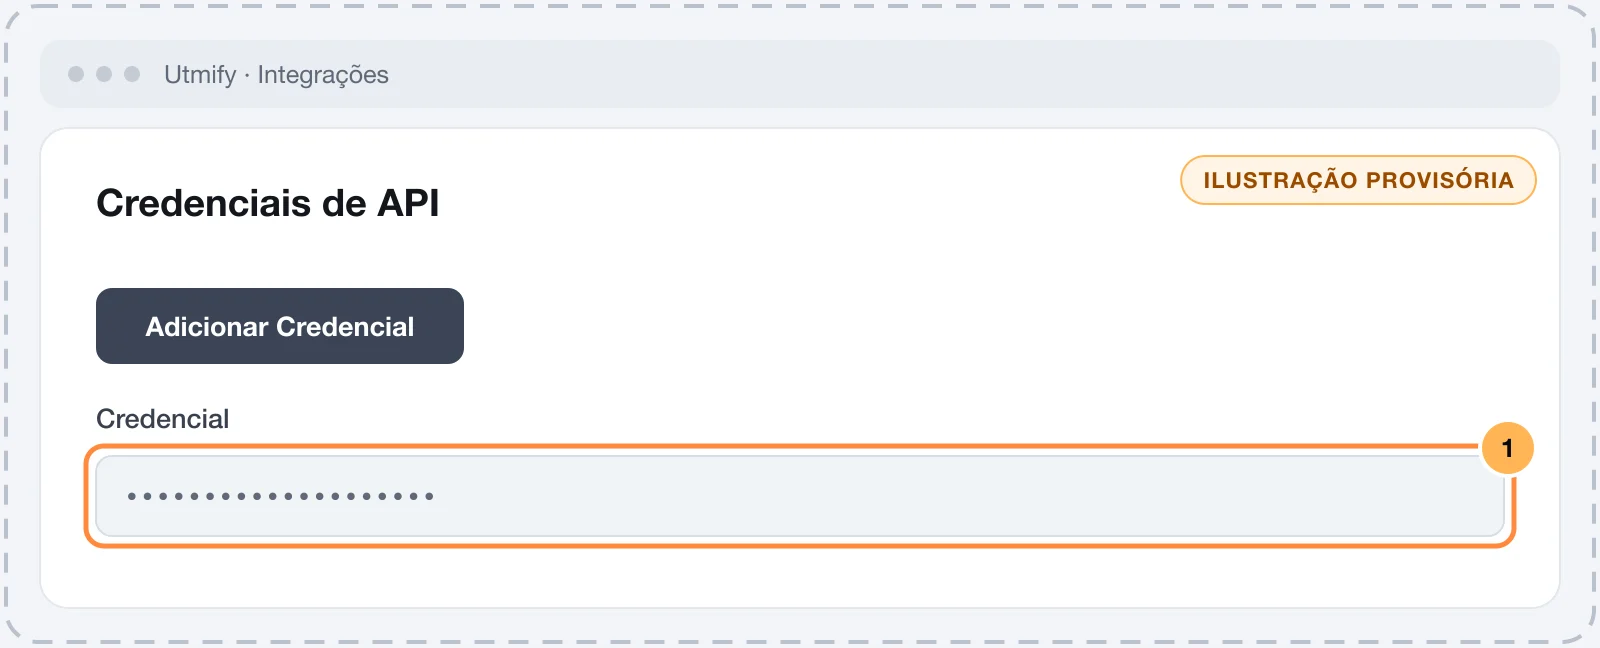
Keep the credential safe
With the credential, anyone can post orders to your Utmify account. Paste it only into Vipter. Once saved, it is stored encrypted and not shown again; the screen only shows its last characters.
Step 2: connect the account in Vipter
- In the Vipter dashboard, open GeneralConversionsAccounts and click Connect account. Choose Utmify.
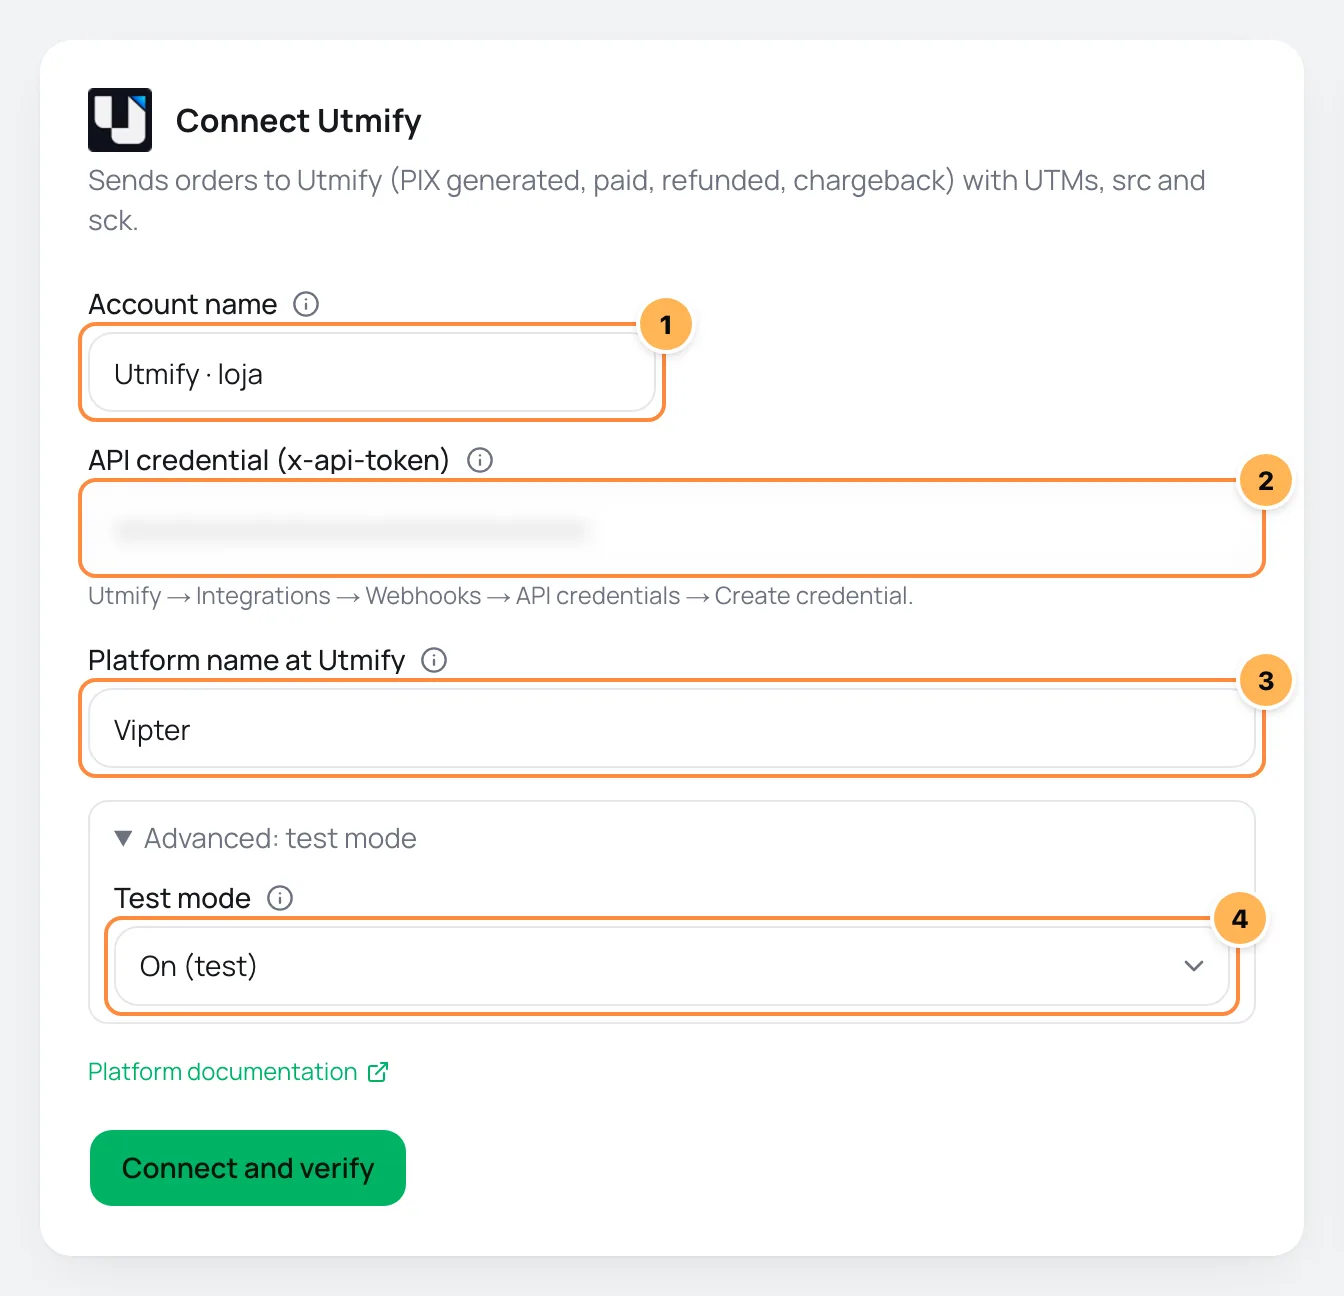
- Fill in the numbered fields. Test mode is under Advanced: test mode.
| # | Field | What to paste |
|---|---|---|
| 1 | Account name | A name to recognize the account, such as "Store Utmify". If left blank, it is "Utmify". |
| 2 | API credential (x-api-token) | The credential from step 1. Required: without it, Utmify receives nothing. |
| 3 | Platform name at Utmify | The name that shows in Utmify as the orders' source. If left blank, it is "Vipter". |
| 4 | Test mode | When on, Utmify checks each order but doesn't save it. Leave it off to sell. |
- Click Connect and verify. Vipter saves the account and sends a test order to confirm the credential. Utmify checks this order and doesn't save it.
- Click Continue, check the products whose orders should go to Utmify and click Finish. Turn on Use automatically on new products to include products created later.
Step 3: turn on renewals and refunds
A new account sends the PIX generated and the payment. Renewal and Refund / chargeback start off.
- Open the account in Accounts and go to the What to send tab.
- Turn on Renewal if you sell subscriptions and want to see each recurring charge in Utmify.
- Turn on Refund / chargeback so Utmify deducts refunds and chargebacks.
- Click Save.
Step 4: verify and test
- On the account's Connection tab, click Verify now to check the credential again.
- Click Send test event. Vipter sends a 1.00 paid test order in the project's currency, always flagged as a test. Utmify checks the order and doesn't save it, so it doesn't show in its dashboard.
It worked if
The verification shows Token accepted by the platform and the test shows Test event accepted by the platform (HTTP 200).. After the first real sale, the order shows in Utmify and the verification shows the first sale sent from the server.
If you turned on test mode, turn it off in Connection and click Save.
What Vipter sends to Utmify
| Event in Vipter | Order status in Utmify |
|---|---|
| PIX generated | waiting_payment |
| Purchase | paid |
| Renewal | paid, as a new order for each charge |
| Refund / chargeback | refunded on a refund, chargedback on a chargeback |
- Each order carries the customer (name, e-mail, phone, tax ID and country), the products, the payment method and the source:
utm_source,utm_medium,utm_campaign,utm_content,utm_term,srcandsck. The UTM script carries this source from your sales page to the checkout. - The commission sent is the order total, without deducting fees.
- Utmify doesn't have the value or Matching data options in What to send: it always gets the order total.
Common problems
-
Required on the credential field
Utmify only works with the credential. Paste the credential from step 1.
-
Token rejected by the platform
The credential was deleted in Utmify or was pasted only in part. Create another one and paste it in Connection. Utmify's response shows below the item.
-
Orders arrive without a source
The buyer reached the checkout without UTMs,
srcorsck. Check the ad links and paste the UTM script on the sales page. -
Orders don't show in Utmify
Test mode is on. Turn it off in Connection and click Save.
-
Your plan does not allow another account sending from the server. Upgrade to connect one more.
Your plan reached its limit of accounts with server delivery. Delete an account with server delivery that you no longer use or change plans in Vipter plan.
What to do next
- Paste the UTM script on your sales page.
- Also see where your sales come from in Vipter itself, in the Sales sources tab.
Connect Fathom
Record checkout visits and the checkout, lead, PIX generated and purchase events, with their value, on your Fathom Analytics site.
How automations work
Learn which sale events Vipter sends to Voxuy, Voxuy Enterprise and Hotzapp, how to read the recent deliveries and how to test without a test button.