Use your own domain for checkout
Serve the checkout and the customer portal on a subdomain of your site, such as checkout.yourstore.com, with the certificate issued automatically.
By default, payment links live on pay.vipter.com. With your own domain, buyers pay on an address with your brand, such as checkout.yourstore.com. The HTTPS certificate is issued automatically, at no cost.
Before you start
- A domain you own and access to the panel where its DNS records are managed (Cloudflare, GoDaddy, Hostinger, Registro.br or another).
- The Admin or Owner role in the Vipter project.
Subdomains only
Use a subdomain, such as checkout.yourstore.com or pay.yourstore.com. The root domain (yourstore.com) is not accepted, because it usually already points to your website.
Step 1: save the subdomain in Vipter
- In the Vipter dashboard, open GeneralSettingsCustom domain.
- Fill in the field and click Save domain.
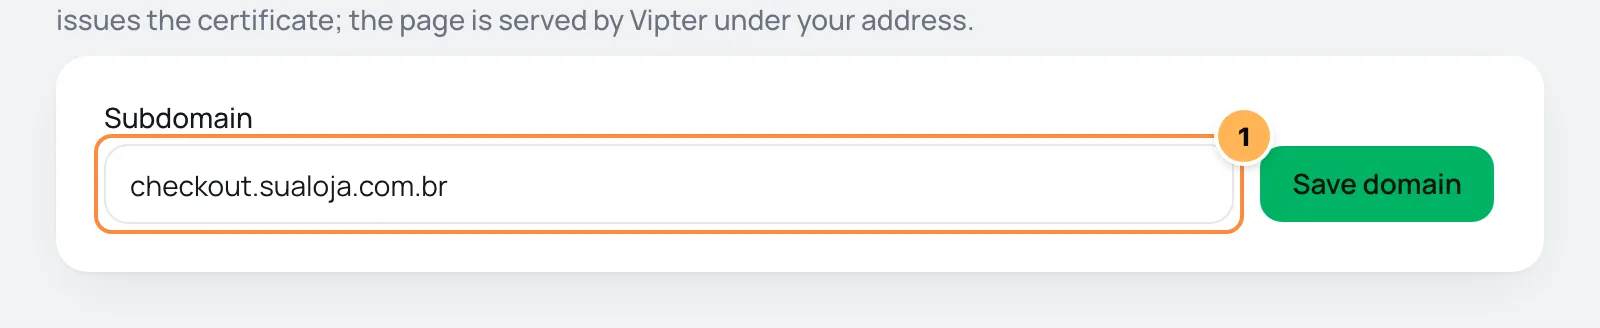
| # | Field | What to paste |
|---|---|---|
| 1 | Subdomain | The full address buyers will see, such as checkout.yourstore.com. |
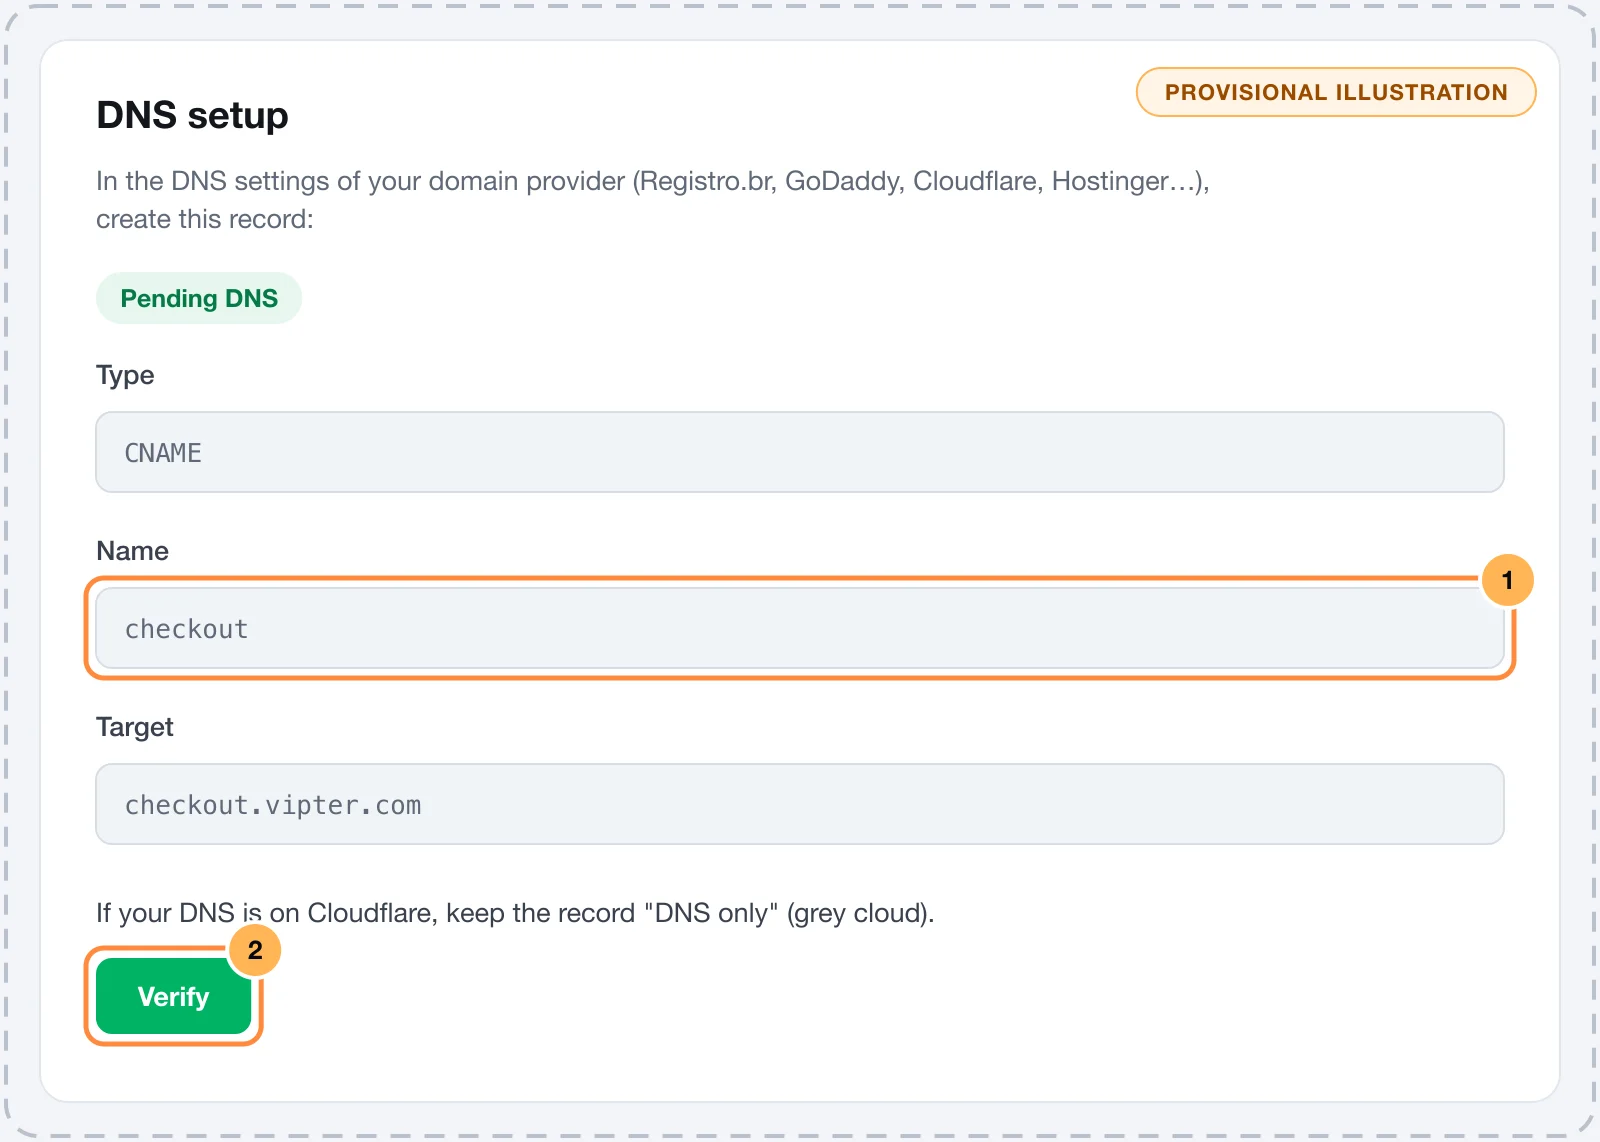
After saving, the screen shows DNS setup with the exact values of the record to create. Each value has a copy button.
Step 2: create the CNAME record in your DNS
Create a record of type CNAME. The Name is the first part of the subdomain (for checkout.yourstore.com, it is checkout), and the Target is the address Vipter showed in step 1. If Vipter also asks for a TXT record, create it with the name and value shown.
- In the Cloudflare dashboard, open the domain and go to DNSRecords.
- Click Add record, choose CNAME and enter the name and target.
- Turn the proxy off: the cloud must be grey ("DNS only"). With the orange cloud, the certificate is not issued.
- Save.
Don't delete other records
Only create the new record. Don't change or delete the records the domain already has: they keep your website and your e-mail working.
Step 3: verify
- Wait for DNS to propagate. It usually takes a few minutes, but it can take up to 24 hours.
- In Vipter, click Verify.
It worked if
The status changes to Active and you see the message Domain verified and active.. From then on, payment links use your domain and the customer portal lives at https://checkout.yourstore.com/portal.
Old links on pay.vipter.com keep working, so ads and e-mails already sent don't break.
Common problems
-
Enter a valid subdomain such as checkout.your-store.com (root domains are not supported).
You entered the root domain or an address with a typo. Use a subdomain, such as
checkout.yourstore.com. -
This hostname is already used by another project.
The subdomain is already linked to another store in Vipter. Pick another one or remove it from the other store.
-
CNAME not found yet. Check the record and try again in a few minutes.
The record has not propagated yet, the name is wrong, or the target has a trailing space. Check the record and try again in a few minutes.
-
DNS is correct; the certificate is being issued (usually a few minutes).
DNS is right and only the certificate is missing. On Cloudflare, check that the cloud is grey. Then click Verify again in a few minutes.
What to do next
- Customize the checkout's logo, colors and titles in GeneralSettingsGeneral.
- Switch the links in your ads and on your sales page to the new address.
Abandoned checkout recovery
Understand when a checkout counts as abandoned, when Vipter notifies your automations, how the recovery link works and how long the data is kept.
Test your store before selling
Make test purchases through the provider's test environment or a real low-value purchase with a refund, and check the order, e-mails, pixels and access.