Create your first project
Create your store in Vipter and learn what each field is for, from country to MCC, and what cannot change later.
The project is your store in Vipter: it holds the catalog, customers, orders and settings. The first time you sign in, Vipter opens project creation. It has three stages: Project, Plan and Activation. This page covers the first one.
Before you start
- A Vipter account.
- The store's website address and business category, if you want to enter them now (both are optional).
Were you invited to a store?
Don't create a project. Open the invitation link: you go straight into the store that invited you. See accept an invitation.
Step 1: fill in the store details
The Create your first project screen comes with country, currency and time zone suggested from your location and with your e-mail as the support contact. Check each field:
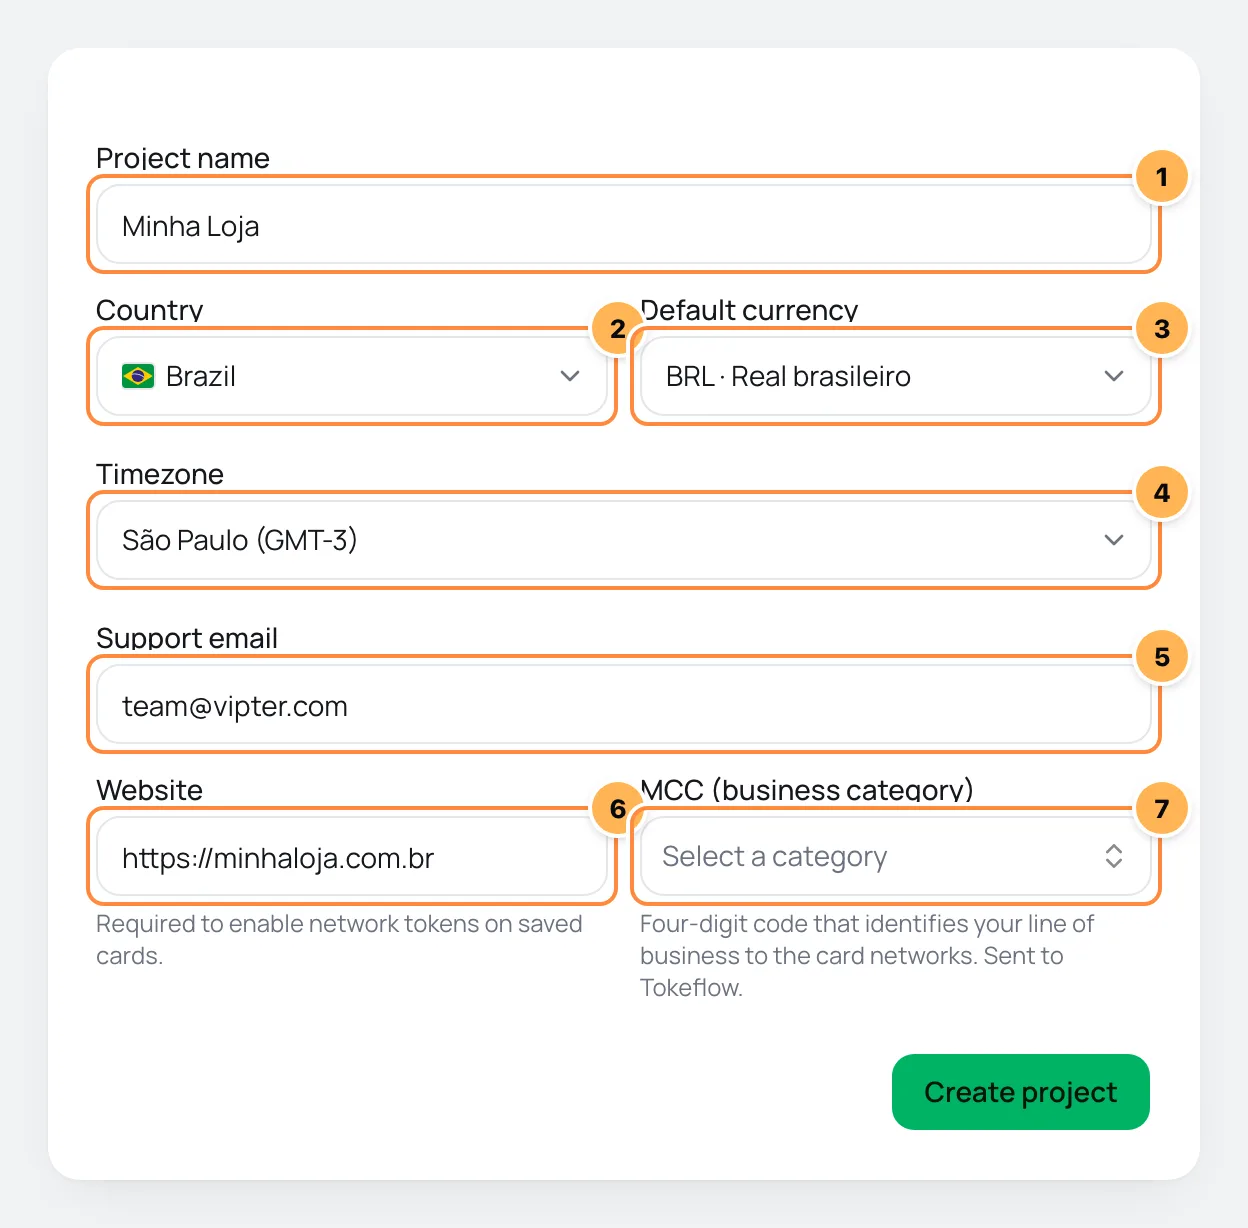
- Project name (required): the store's name, 2 to 80 characters. It shows on the checkout, in e-mails to buyers and in the dashboard's project list.
- Country: the country where the store is. Name, country and contact show on the checkout pages and in e-mails.
- Default currency: the currency the dashboard uses for the store's numbers and the one you set shipping costs in. Offers can have prices in other currencies.
- Timezone: the time zone for dates and times in e-mails sent to buyers, such as a PIX expiration.
- Support email: the contact the buyer sees on the thank-you page and in the customer portal. Use an e-mail someone reads.
- Website (optional): the store's website address, starting with
https://. Required to enable network tokens on saved cards. - MCC (business category) (optional, required if you fill in the website): the 4-digit code for your line of business with the card networks. Search by activity or type the code.
Step 2: create the project
Click Create project. The project is created right away and you land on the store's dashboard.
The store can't sell yet: a banner at the top says the payment account is being set up, with the Choose a plan link. The next step is to choose the plan and activate the account.
It worked if
The store's dashboard opens with the Getting started card, and the first pending step is Choose a plan.
What you can change later
Name, country, currency, time zone, support e-mail, website and MCC stay editable in GeneralSettingsGeneral.
Website and MCC can become fixed
With the website and MCC filled in, the store can be enrolled with the card networks to use network tokens on saved cards. After enrollment, the store's name, website, MCC and address are fixed with the card networks, and the website and MCC can no longer be changed in Vipter. Check both before saving.
Common problems
-
Set the MCC together with the website: both are sent together at card-network enrollment.
You filled in the website without the MCC. Pick the business category in field 7 or leave the website blank for now.
-
Enter a four-digit code
The MCC always has 4 digits. If your activity doesn't show up in the search, type the code.
-
Your plan covers N store(s). Upgrade to create another.
Your account already has the number of stores the plan covers. Without a plan, the account can have one store. To create another, change plans in Vipter plan.
What to do next
- Choose the plan and activate the account.
- Complete the store's address, brand and sales locations in GeneralSettingsGeneral.
Create an account and sign in
Create your Vipter account with e-mail or Google, confirm your e-mail, reset your password and accept an invitation to a store's team.
Choose the plan and activate the account
Choose your Vipter plan, pay the first month and follow the activation of the store's payment account.