Connect Google Tag Manager
Load your GTM container on the checkout and receive purchase events in the dataLayer, using the GA4 e-commerce standard, to fire your own tags.
With Google Tag Manager connected, Vipter loads your container on the checkout and the thank-you page and pushes each event to the dataLayer, using the GA4 e-commerce standard. Inside GTM, you decide which tags fire on each event. Use GTM for platforms Vipter doesn't connect directly or for tags you already maintain there.
Before you start, it helps to read how conversion tracking works.
Before you start
- A Web container in Google Tag Manager, with permission to publish.
- The Admin or Owner role in the Vipter project.
- At least one product created in Vipter.
GTM only receives from the browser
This platform only receives events from the browser: a PIX paid after the buyer closed the page is not counted. If the tag is for Meta, TikTok or GA4, prefer connecting the platform directly in Vipter, with server delivery.
Step 1: copy the container ID
In Google Tag Manager, open the Web container. The ID shows at the top of the workspace and starts with GTM-, such as GTM-AB12CD3. Copy this ID.
Step 2: connect the account in Vipter
- In the Vipter dashboard, open GeneralConversionsAccounts and click Connect account. Choose Google Tag Manager.
- Fill in the numbered fields.
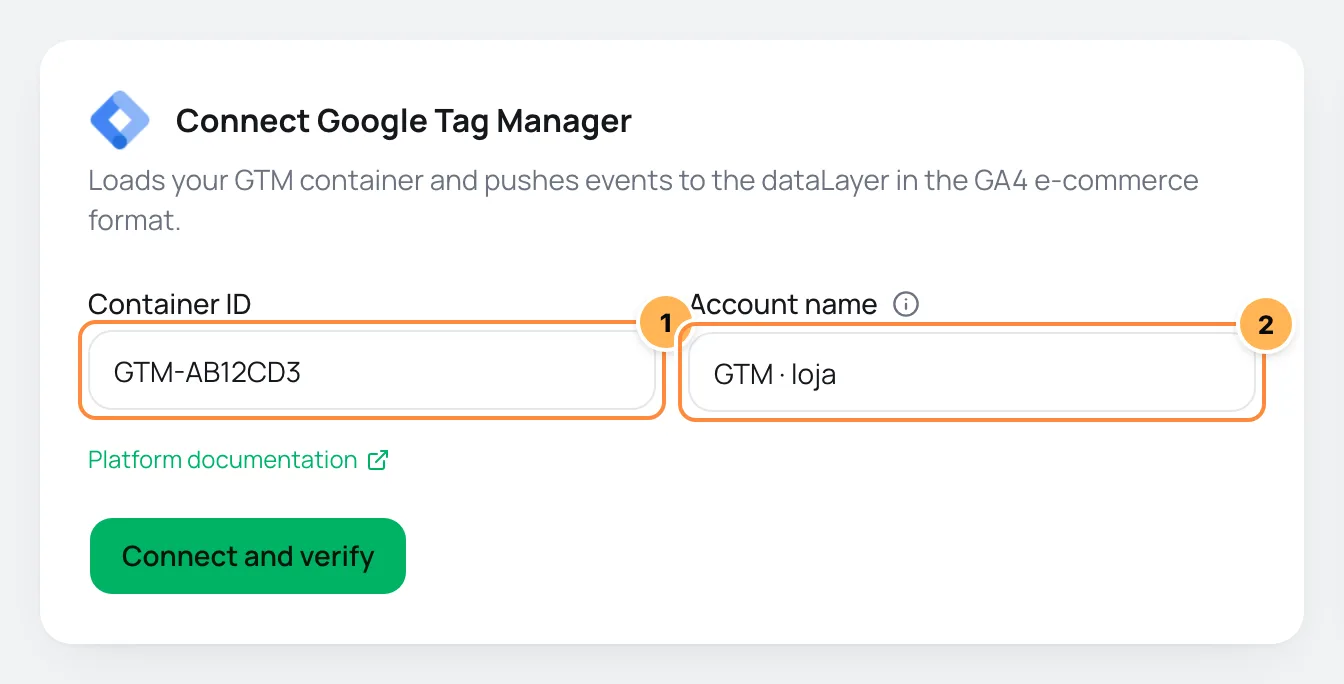
| # | Field | What to paste |
|---|---|---|
| 1 | Container ID | The container ID from step 1, with the GTM- prefix. |
| 2 | Account name | A name to recognize the account, such as "Store GTM". If left blank, it is "Google Tag Manager". |
- Click Connect and verify and then Continue.
- Check the products where the container should load and click Finish. Turn on Use automatically on new products to include products created later.
Step 3: create the triggers in GTM
Vipter doesn't create anything inside your container. For a tag to fire on a checkout event:
- In GTM, create a Custom Event trigger with the event name, such as
purchase. The list of names is in the table below. - To read the value, the currency or the order ID, create Data Layer Variables, such as
ecommerce.value,ecommerce.currencyandecommerce.transaction_id. - Attach the trigger to the tags that should fire and publish the container.
Each event reaches the dataLayer in this format:
dataLayer.push({ ecommerce: null }); // clears the previous event
dataLayer.push({
  event: 'purchase',
  event_id: 'ord_…:purchase',
  vipter_event: 'purchase',
  payment_type: 'pix',
  ecommerce: {
    currency: 'BRL',
    value: 197,
    transaction_id: 'ord_…',
    items: [{ item_id: '…', item_name: 'Example course', price: 197, quantity: 1 }],
  },
  user_data: { email: 'buyer@example.com', phone_number: '…' },
});event_idis the same identifier Vipter uses in server deliveries. Use it as the event ID in tags that deduplicate.vipter_eventis the event's name in Vipter, the same across all platforms.transaction_idonly exists once there is an order.user_datais only sent with Email on under Matching data. The phone is sent with Phone on. The data goes as the buyer typed it, without hashing.
Step 4: test
- In GTM, open Preview mode and enter the checkout address of a product linked to the account.
- Go through the checkout. Each event shows in the preview list with the
dataLayerdata. - In Vipter, the account's Connection tab shows when the first event was received, after someone fills in their details on the checkout.
It worked if
GTM's preview shows begin_checkout when the checkout opens and purchase on the thank-you page, and your tags show as fired.
What Vipter sends to the dataLayer
| Event in Vipter | Event in the dataLayer |
|---|---|
| Page view | vipter_page_view |
| Checkout started | begin_checkout |
| Lead (contact filled) | generate_lead |
| Shipping chosen | add_shipping_info |
| Payment started | add_payment_info |
| PIX generated | pix_generated |
| Purchase | purchase |
| Subscription started | subscribe |
- The page view goes as
vipter_page_view, not aspage_view. Use this name in the trigger. - Renewal and Refund / chargeback don't reach GTM, because they happen after the buyer has left the checkout.
- In What to send, choose the events, the Conversion value and the Value currency. See events and values.
Common problems
-
Invalid format on the ID field
The ID must start with
GTM-. Don't paste the whole install snippet or a GA4 ID (G-). -
Purchases show up twice in GA4 or Meta
The same platform is connected directly in Vipter and also has a tag inside GTM. Keep only one of the two paths.
-
The tags don't fire
The container wasn't published after creating the triggers, or the event name in the trigger doesn't match the table. Names are case-sensitive.
-
Nothing loads when the buyer declines cookies
With the consent banner on, the container only loads after the buyer accepts.
What to do next
- Connect Google Analytics 4 directly in Vipter to also count the sales confirmed by the server.
- Paste the UTM script on your sales page to keep the visit's source all the way to the checkout.
Connect Google Analytics 4
Send visits, checkout steps and purchases to GA4, from the browser and through the Measurement Protocol, including renewals and refunds.
Connect Taboola
Send checkout visits and purchases to Taboola, through the pixel in the browser and by server postback when the buyer comes from an ad with tblci.