Connect The Members
Grant The Members products to the buyer when the sale is approved and deactivate their subscription on refund, chargeback or cancellation.
With The Members connected, every approved sale grants the buyer the products from The Members that you chose for that offer. Buyers who don't have an account yet are registered and get the access e-mail from The Members. When the purchase is refunded, charged back, or the subscription is cancelled or expires, the student's subscription to these products is deactivated, and their account stays there.
Before you start, read how member areas work.
Before you start
- A platform in The Members with the products already registered in the plan.
- The Admin or Owner role in the Vipter project.
- A product with at least one offer in Vipter.
- For the developer token: someone who knows how to make two API calls, or help from The Members support.
Step 1: copy the platform token
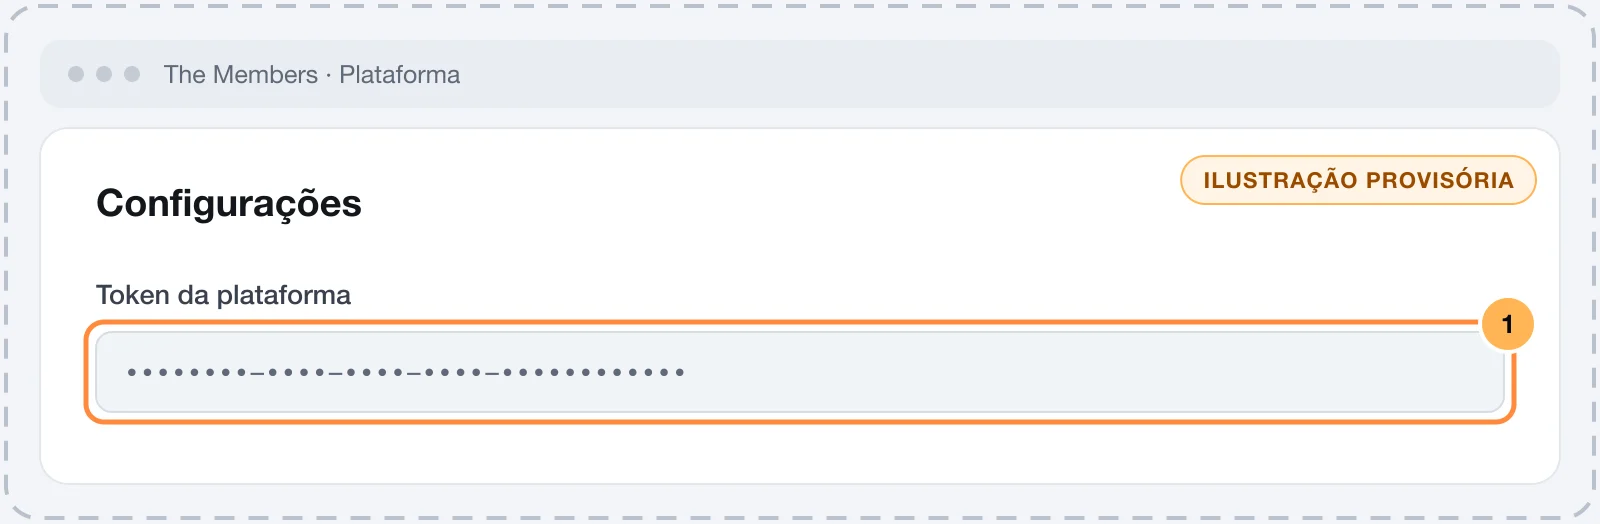
- In The Members dashboard, open PlataformaConfiguraçõesToken (Platform › Settings › Token).
- Copy the platform token.
Step 2: create the developer token
The developer token is not in the dashboard. It is created only once through The Members API, as the "Criando usuário desenvolvedor" (Creating a developer user) page of the The Members documentation explains. In short:
- A
POSTtohttps://api.themembers.com.br/api/registercreates the developer user, with your data and your company's data:name,document,email,phone,corporation_name,corporation_cnpj,corporation_address,app_nameandapp_desc. Keep theidfrom the response. - A
POSTtohttps://api.themembers.com.br/api/generate-token, withuser_idset to thatid, returns thetoken. This is the developer token.
If you already have a developer token from another integration with The Members, you can use the same one. If in doubt, ask The Members support for help.
Keep the tokens safe
The two tokens together can register students and grant or remove products on your platform. Paste them only into Vipter. Once saved, the fields only show their last characters.
Step 3: connect in Vipter
- In the Vipter dashboard, open GeneralIntegrationsMember areasThe Members.
- Under Connection, fill in the fields and leave Active — send access to this platform on.
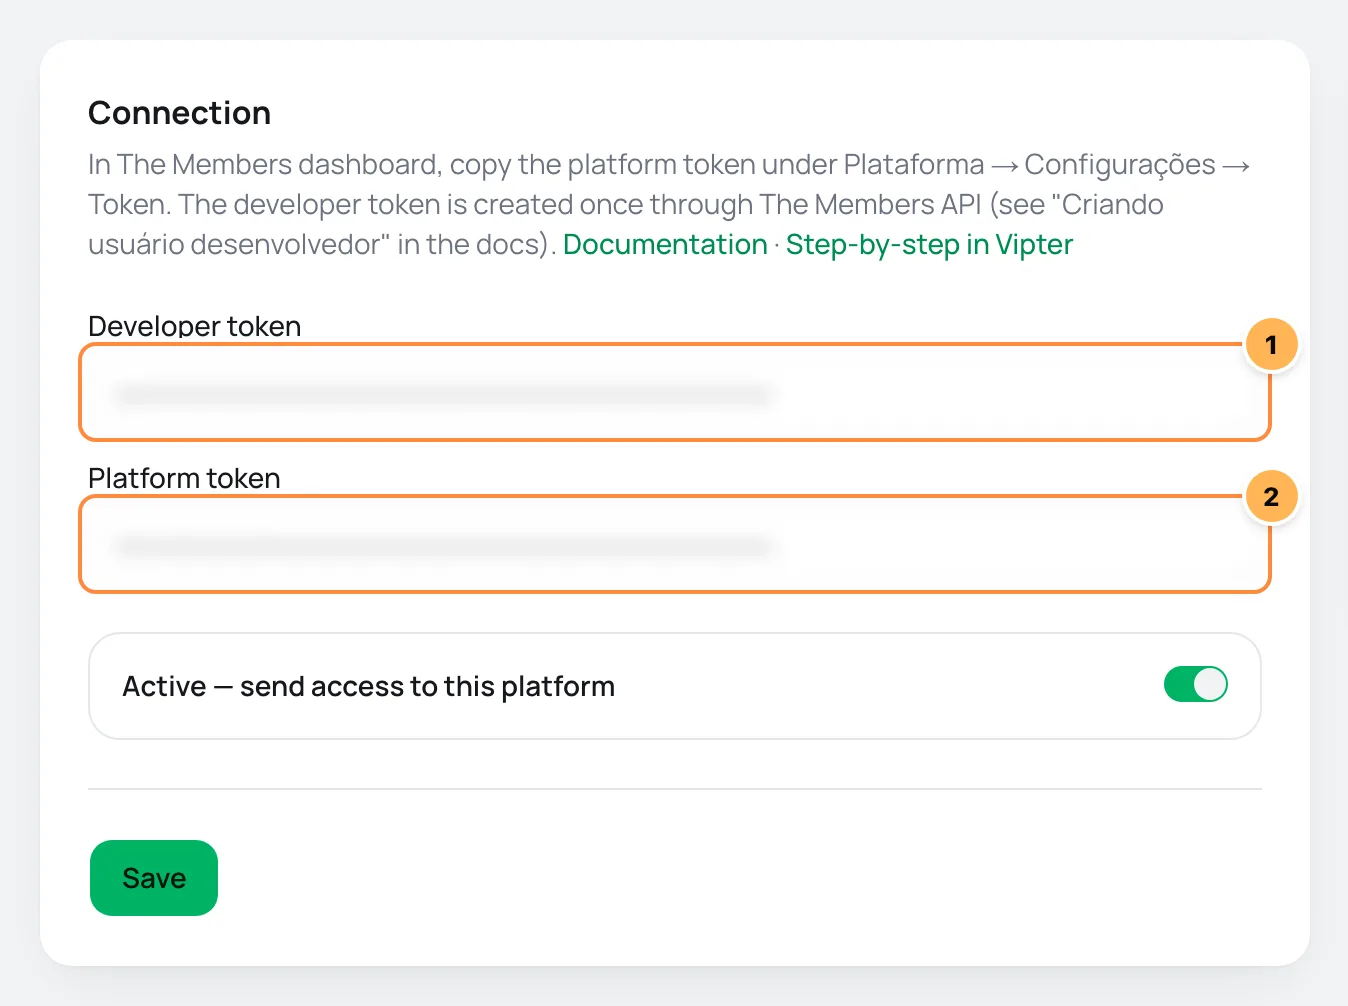
| # | Field | What to paste |
|---|---|---|
| 1 | Developer token | The developer token created in step 2. |
| 2 | Platform token | The platform token copied in step 1. |
- Click Save and then Test connection. Vipter lists the platform's products with the two tokens.
Step 4: link each offer to its products
- Under Access rules, pick the Offer.
- Enter the Product IDs in The Members. To grant more than one, separate them with commas.
- Click Add rule. Repeat for every offer that grants access.
Step 5: test with a purchase
Make a test purchase of an offer that has a rule, with an e-mail you can open.
It worked if
The purchase shows up under Recent deliveries as Access granted, with the status succeeded, and, a few minutes later, the student appears in The Members with the product granted and gets the access e-mail.
The Members registers new students through a queue. The delivery shows as succeeded when the queue accepts the registration, and the student shows up on the platform shortly after.
How it works afterwards
- Approved sale, new student: Vipter registers the student with all the rule's products. The Members sends the access e-mail.
- Approved sale, existing student: Vipter reactivates the student's subscription to each product, or creates one when they don't have it yet. This way, someone who comes back after a cancellation reuses the same subscription.
- Refund, chargeback, subscription cancelled or expired: the student's subscription to these products is deactivated. Their registration is not deleted.
- Data sent: first name, last name, e-mail, CPF or CNPJ (Brazilian individual or company taxpayer ID) with punctuation, and phone, in the
(11)99999-9999format for Brazilian numbers.
Retries and resend
If The Members does not answer or returns a temporary error, Vipter tries again on its own after 5 minutes, 30 minutes, 2 hours, 6 hours and 24 hours. A permanent rejection, such as a wrong token or a product that does not exist, is not retried. After you fix it, use Resend on the delivery's row. See retries and resend.
Common problems
-
The platform rejected the credentials
One of the tokens is wrong. The platform token is under Plataforma › Configurações › Token (Platform › Settings › Token). The developer token is the one returned by
generate-token. -
The delivery failed on "product …"
The product ID does not exist in The Members plan. Use the same ID that The Members checkout integrations use. Fix the rule and grant this buyer access directly in The Members: the resend repeats the old product.
-
The delivery worked, but the student does not show up
Registering new students goes through a queue at The Members. Wait a few minutes. If the student still does not show up, check with The Members support.
What to do next
- Understand how member areas work.
- To e-mail the student, connect an e-mail provider.
Connect Curseduca
Add the buyer to Curseduca access groups (classes) when the sale is approved and remove access on refund, chargeback or cancellation, without deleting the student.
Connect Circle
Add the buyer to your Circle community's access groups when the sale is approved, and remove them from those groups on refund, chargeback or cancellation.