Connect Mailchimp
Add the buyer to your Mailchimp audience on every sale event, with tags per event and per offer and e-mail confirmation for anyone who is not a contact yet.
With Mailchimp connected, every Vipter sale event creates or updates the buyer in your Mailchimp audience and applies the tags you set, such as pix-gerado, cliente or curso-x. Mailchimp journeys and segments start from these tags.
Before you start, read how automations work.
Before you start
- A Mailchimp account with an audience already created.
- The Admin or Owner role in the Vipter project.
Step 1: create the API key and find the audience ID
- In Mailchimp, open ProfileExtrasAPI keys and create a key.
- Copy the key. It ends with the account's data center, such as
-us21. - Open AudienceSettingsAudience name and defaults and copy the Audience ID, such as
a1b2c3d4e5.
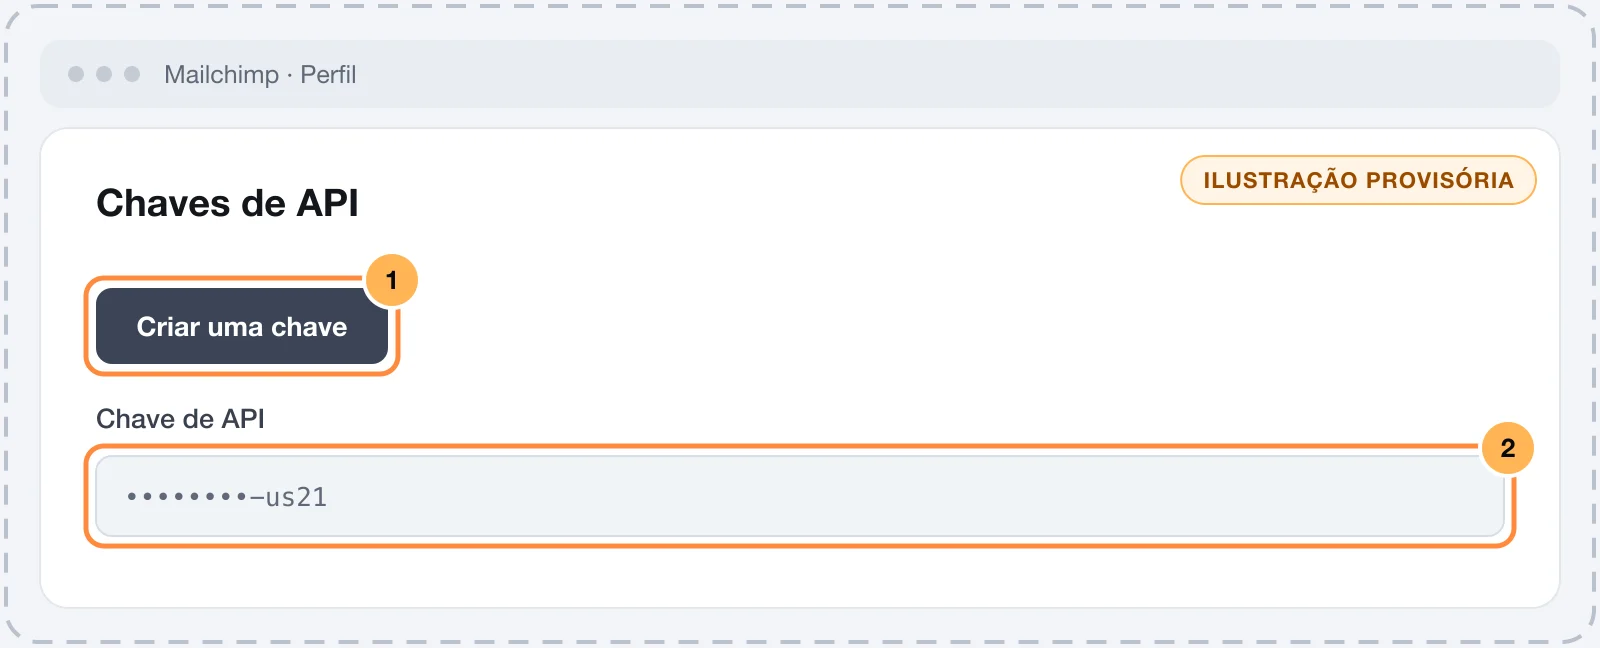
The audience ID is not the audience name. If the test in step 2 fails on the audience, this is almost always why.
Keep the key safe
This key can read and change the account's contacts and send campaigns. Paste it only into Vipter. Once saved, the field only shows its last characters.
Step 2: connect in Vipter
- In the Vipter dashboard, open GeneralIntegrationsCRM and email marketingMailchimp.
- Under Connection, fill in the numbered fields.
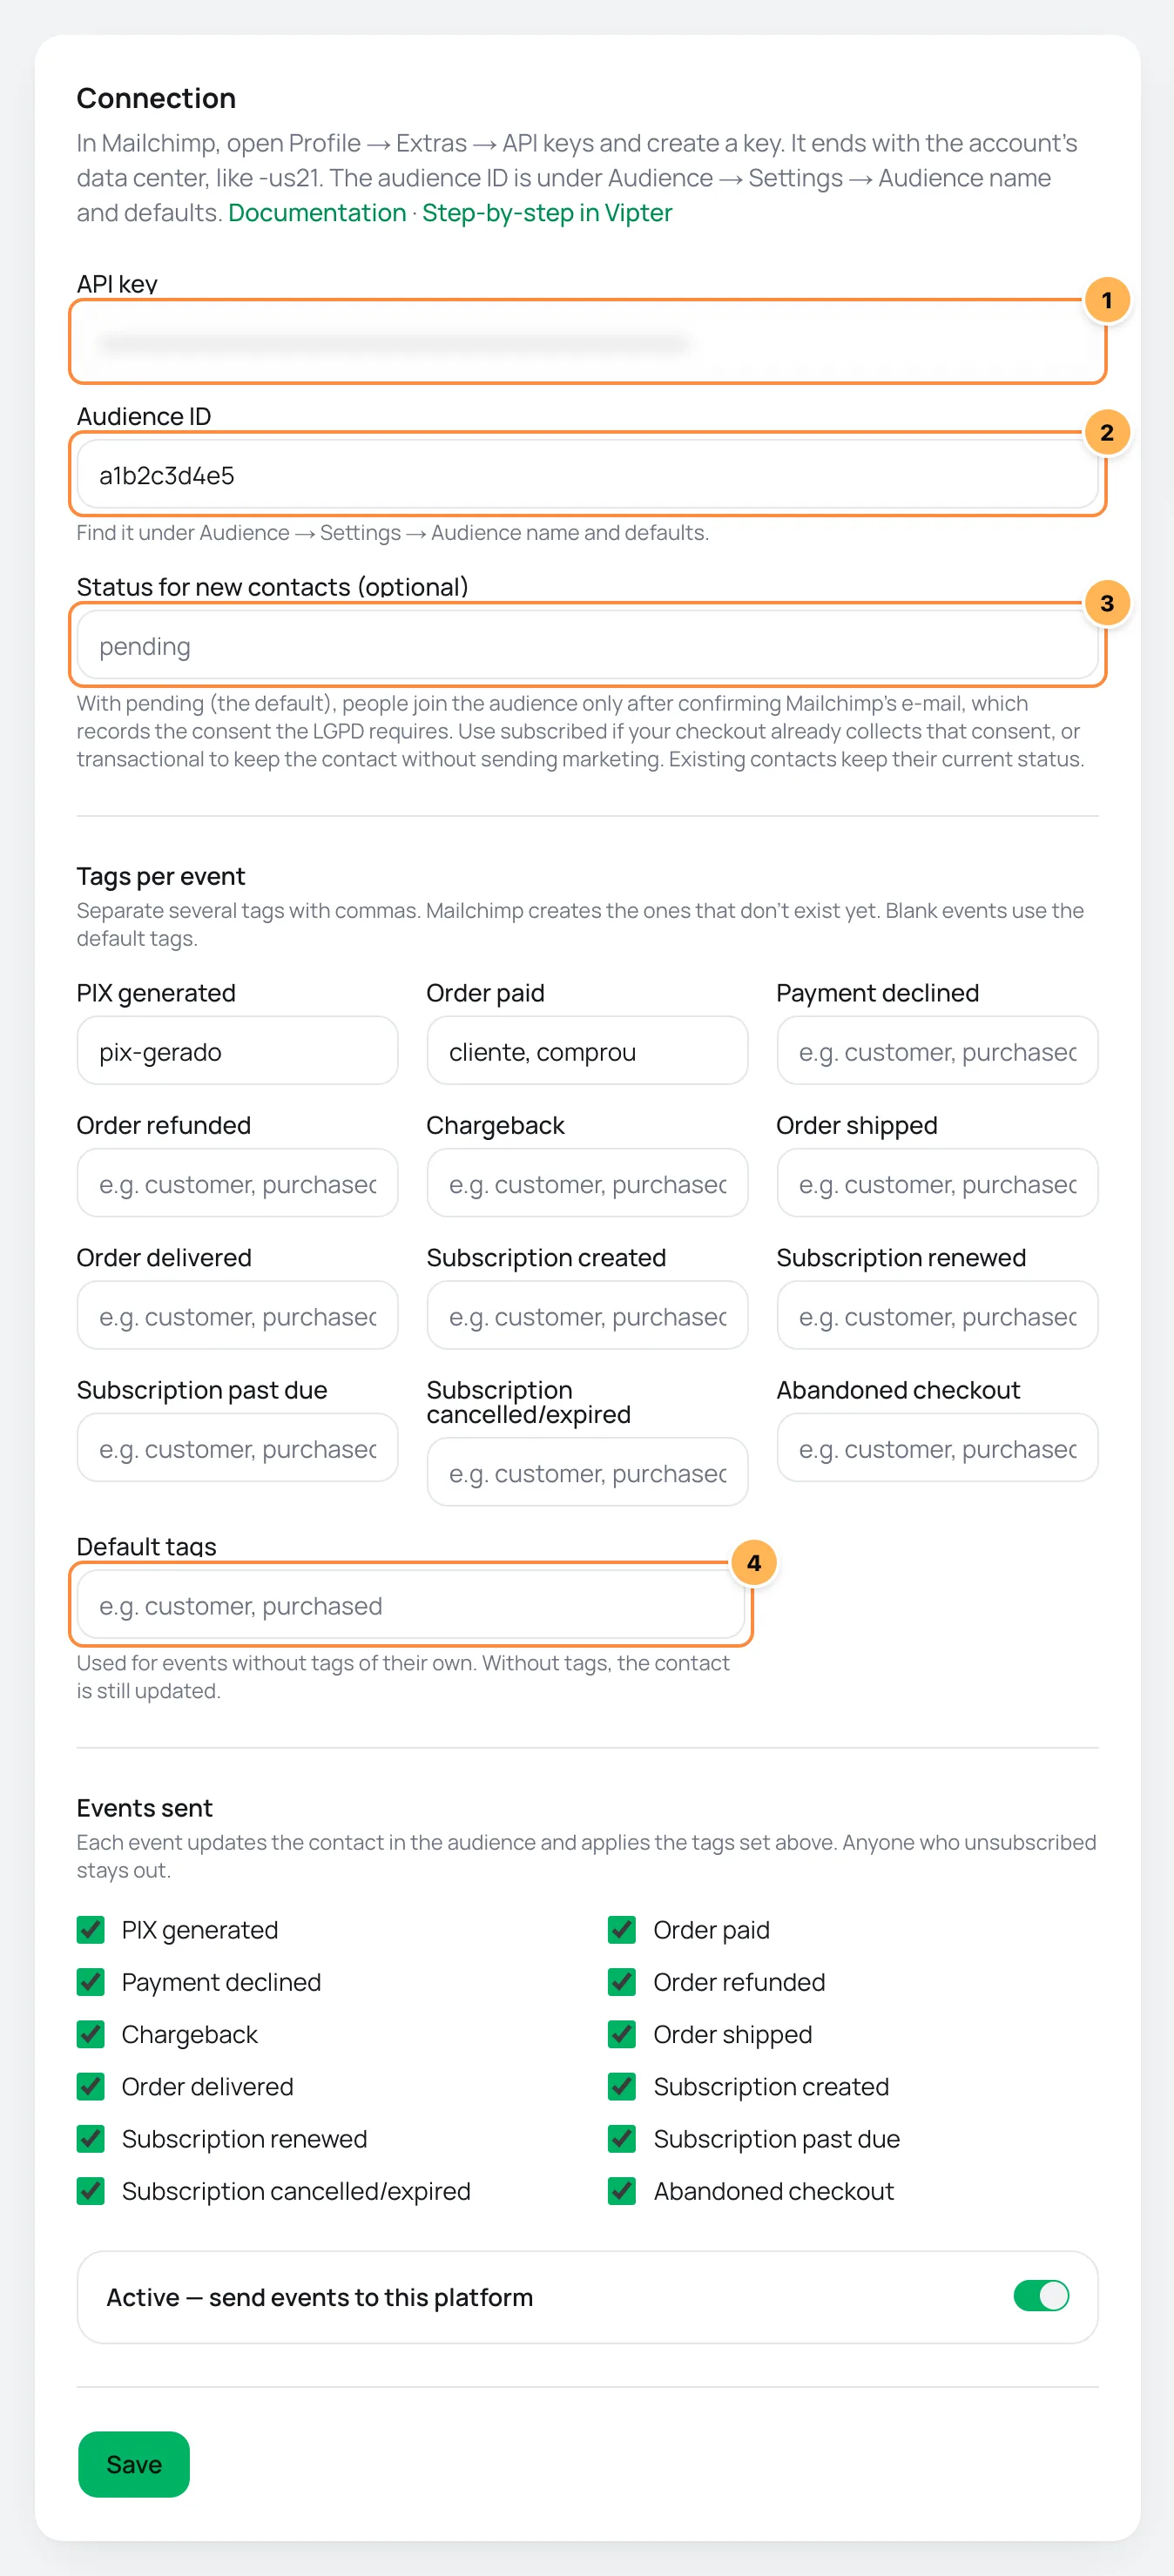
| # | Field | What to paste |
|---|---|---|
| 1 | API key | The API key from step 1, ending in -us21 or similar. |
| 2 | Audience ID | The audience ID from step 1. |
| 3 | Status for new contacts (optional) | How a new contact joins the audience: pending, subscribed or transactional. Left blank, pending. See below. |
| 4 | Default tags | The tags for the events left blank under Tags per event. It can stay empty. |
- Under Tags per event, enter the tags for each event, separated by commas, such as
pix-geradoin PIX generated andcliente, comprouin Order paid. - Under Events sent, uncheck what you don't want to send.
- Leave Active — send events to this platform on, click Save and then Test connection. The test checks the key and the audience ID.
Status for new contacts
| Value | What happens to someone not yet in the audience |
|---|---|
pending (default) | Mailchimp sends a confirmation e-mail, and the person only joins the audience after confirming. The confirmation records the consent that Brazil's data protection law, LGPD, requires for e-mail marketing. |
subscribed | The person joins as subscribed right away. Use it only if your checkout already collects consent for e-mail marketing. |
transactional | The contact is stored without receiving marketing. |
The status only applies to new contacts. Anyone already in the audience keeps their current status, and anyone who unsubscribed stays out.
Step 3: use tags per offer (optional)
- Under Tags per offer, pick the Offer.
- Enter the Tags, such as
curso-x. - Click Add rule.
Optional: the offer's tags join the event's when the purchase is confirmed (order paid, subscription created or renewed). Abandoned carts, PIX generated and refunds get only the event's tags. The rule also applies to the other offers of the same product.
What happens on each event
- Contact: created or updated in the audience by e-mail, with first name (
FNAME), last name (LNAME) and phone (PHONE). If the audience's phone field rejects the number, for example because it uses the United States format, the contact goes without the phone. - Tags: the event's tags and, on a confirmed purchase, the offer rule's tags. Mailchimp creates any tag that doesn't exist.
Tags are never removed. Use the refund, chargeback and cancellation tags in your segments and journeys.
Deliveries, retries and resend
- sent: contact and tags applied.
- skipped: the sale has no e-mail (
customer has no e-mail). - failed: the reason starts with the step,
memberortags. A refusal from Mailchimp, such as a wrong key or audience, is not retried. Temporary failures get automatic retries.
After you fix the cause, use Resend. See retries and resend.
Common problems
-
The delivery failed with "invalid Mailchimp API key: it must end with the data center"
Only part of the key was pasted. Copy the whole key, ending in
-us21or similar. -
The platform refused the credentials with code 404
The audience ID is wrong. Copy it again from Audience name and defaults.
-
The delivery shows as sent, but the contact doesn't appear in the audience
With
pending, the person only joins after confirming the Mailchimp e-mail. Until then, they show as pending.
What to do next
- Understand values per event and offer rules.
- For the purchase e-mails, such as confirmation and access, connect an e-mail provider.
Connect HubSpot
Create and update the contact in HubSpot on every sale event, mark buyers who paid as customers and open a deal for each paid order, in the pipeline and stage you choose.
Connect Brevo
Create and update the contact in Brevo on every sale event and add the buyer to the lists you choose per event and per offer.