Connect Brevo
Create and update the contact in Brevo on every sale event and add the buyer to the lists you choose per event and per offer.
With Brevo connected, every Vipter sale event creates or updates the buyer's contact by e-mail and adds it to the lists you set: a PIX generated list, a customers list, one list per course. Brevo automations start when the contact joins a list.
Before you start, read how automations work.
Before you start
- A Brevo account with the lists already created.
- The Admin or Owner role in the Vipter project.
Step 1: generate the API key and note the lists
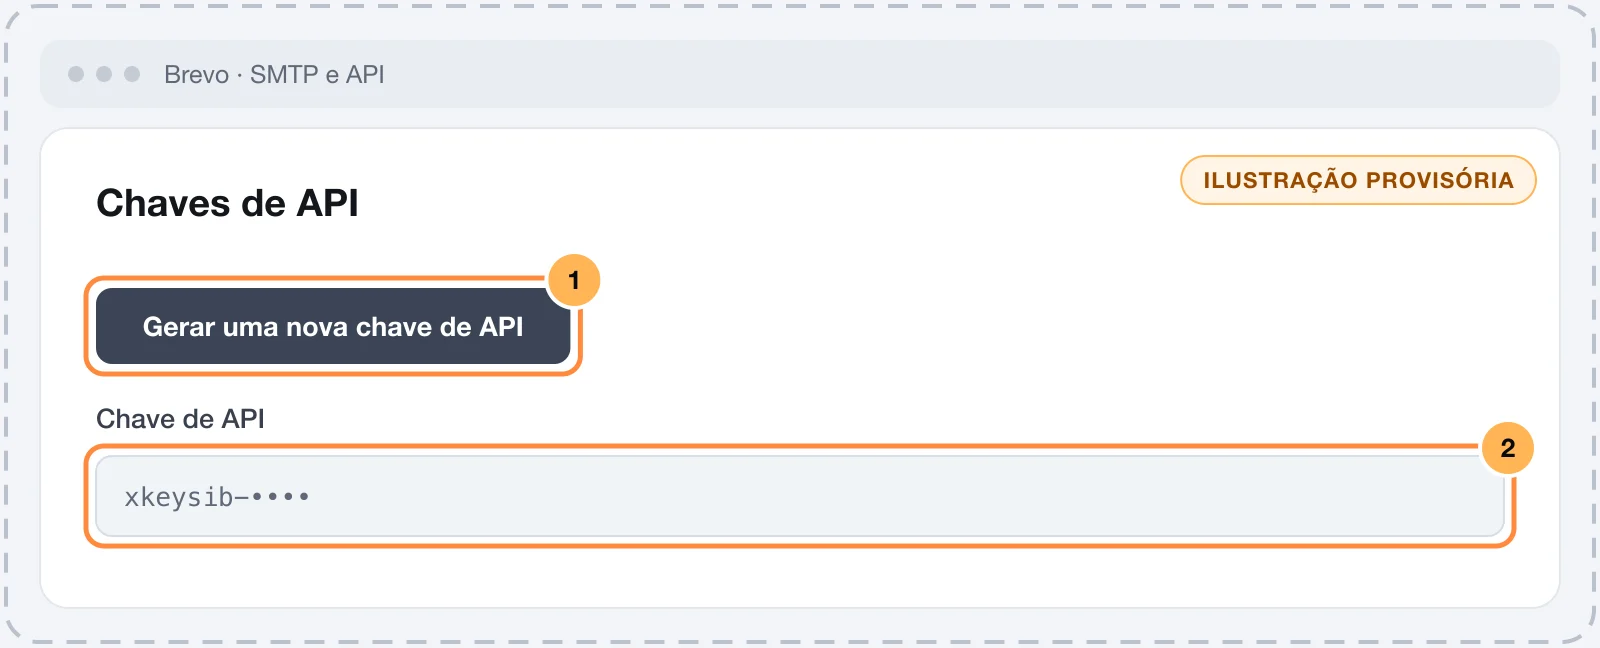
- In Brevo, open the account menu and go to SMTP & APIAPI Keys.
- Generate a key and copy it. It starts with
xkeysib-. - Under ContactsLists, write down the ID of each list you will use. The ID is a number.
Keep the key safe
This key can read and change contacts and send e-mails from your account. Paste it only into Vipter. Once saved, the field only shows its last characters.
Step 2: connect in Vipter
- In the Vipter dashboard, open GeneralIntegrationsCRM and email marketingBrevo.
- Under Connection, fill in the numbered fields.
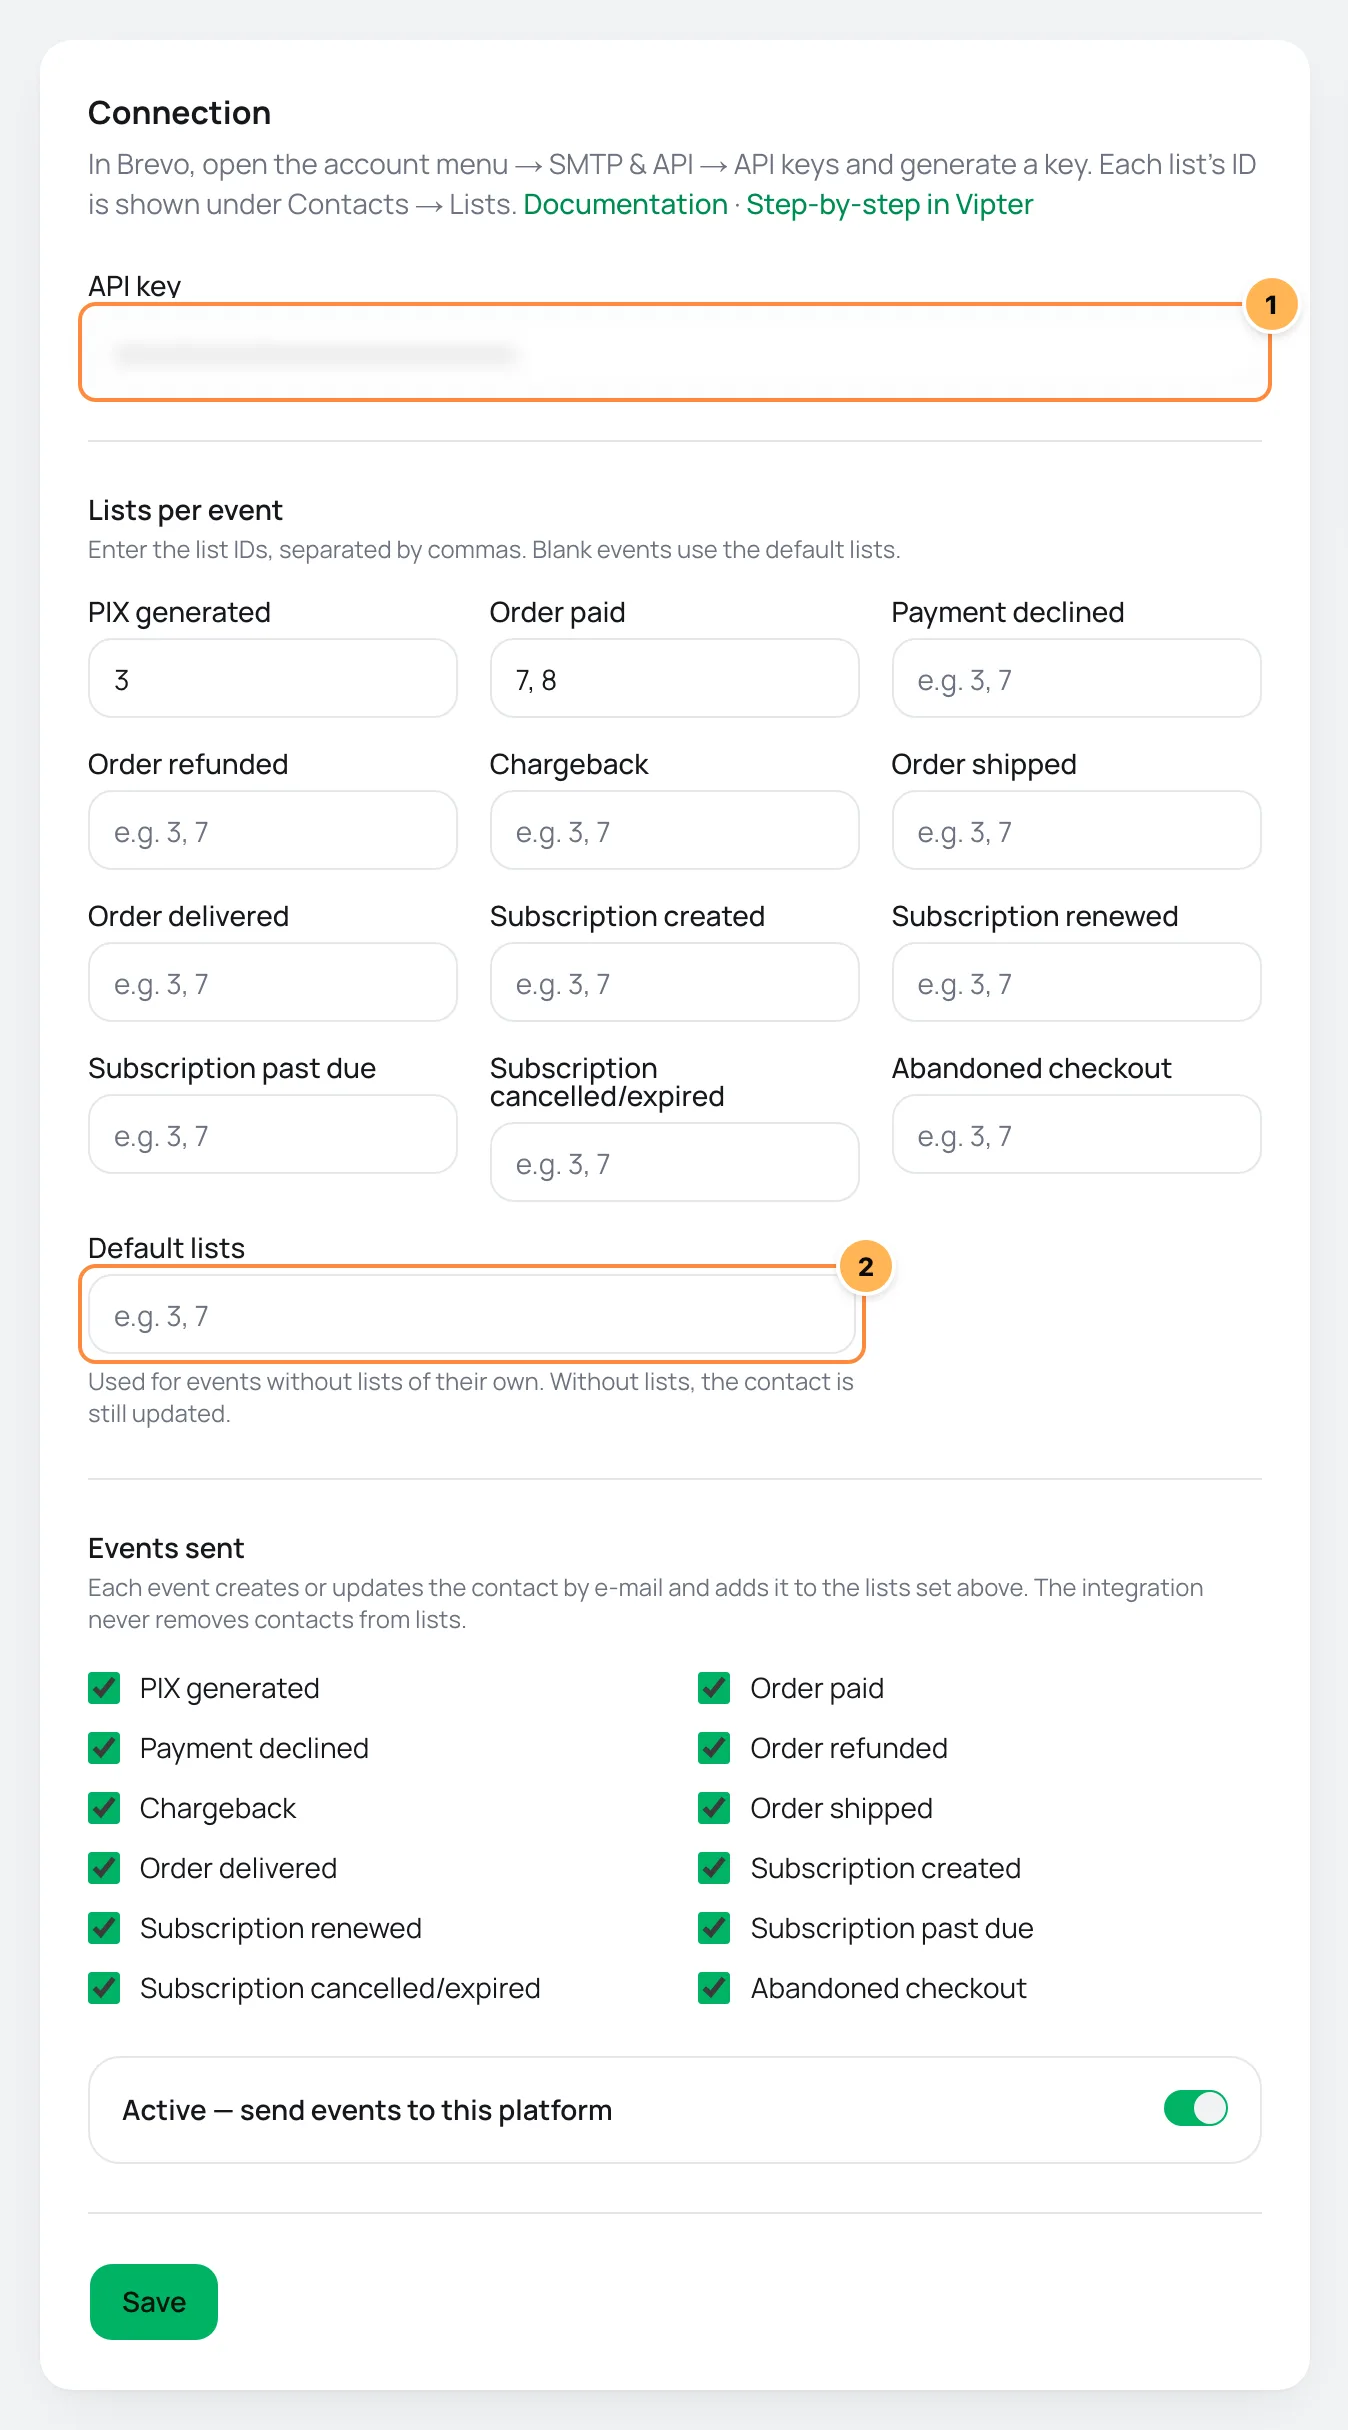
| # | Field | What to paste |
|---|---|---|
| 1 | API key | The key you generated in step 1. |
| 2 | Default lists | The list IDs for the events left blank under Lists per event, separated by commas. It can stay empty. |
- Under Lists per event, enter the list IDs for each event, separated by commas, such as
3in PIX generated and7, 8in Order paid. - Under Events sent, uncheck what you don't want to send.
- Leave Active — send events to this platform on, click Save and then Test connection.
The list fields only accept numbers separated by commas. A list name in place of the ID shows Invalid value for this platform..
Step 3: use lists per offer (optional)
- Under Lists per offer, pick the Offer.
- Enter the List IDs, such as
12. - Click Add rule.
Optional: the contact also joins the offer's lists when the purchase is confirmed (order paid, subscription created or renewed). An abandoned cart for this offer doesn't join the offer's list, only the event's list. The rule also applies to the other offers of the same product.
What happens on each event
- Contact: created or updated by e-mail. The name goes into Brevo's default attributes in English, Portuguese and Spanish at the same time (
FIRSTNAMEandLASTNAME,NOMEandSOBRENOME,NOMBREandAPELLIDOS), because these attributes' names depend on the account language. Brevo keeps only the ones that exist in your account. - Phone: goes in the
SMSattribute, with the country code. Brevo requiresSMSto be unique and valid: if it rejects the number, the contact is saved without it. - Lists: the event's lists and, on a confirmed purchase, the offer rule's lists.
Vipter never removes a contact from a list and never touches the blocklist: anyone blocked stays blocked.
Deliveries, retries and resend
- sent: contact created or updated, in the event's lists.
- skipped: the sale has no e-mail (
customer has no e-mail). - failed: Brevo refused or did not answer. A refusal, such as a wrong key or a list that doesn't exist, is not retried. Temporary failures get automatic retries.
After you fix the cause, use Resend. See retries and resend.
Common problems
-
The platform refused the credentials with code 401
The key is wrong or was deleted in Brevo. Generate another one and save.
-
The delivery failed with 400 mentioning the list
One of the lists you entered doesn't exist in the account. Check the IDs in Contacts › Lists.
-
The contact joined without a name
The account has none of the name attributes. Create
FIRSTNAMEandLASTNAME(orNOMEandSOBRENOME) in Brevo's contact attributes.
What to do next
- Understand values per event and offer rules.
- See the events sent and when each one goes out.
Connect Mailchimp
Add the buyer to your Mailchimp audience on every sale event, with tags per event and per offer and e-mail confirmation for anyone who is not a contact yet.
Connect Leadlovers
Place the buyer in a Leadlovers machine, sequence and level on every sale event, with one funnel per event and another per offer for buyers.